
It seems like there is such a learning curve to learning to watercolor with all the variables. how much water, what the quality of the paper and paint and so on are. That sometimes the actual real things such as shadows are a secondary thing in a lot of the tutorials it seems like, or they are "abstract" and there are none. For me I consider my self still learning. learning to translate where I see the light with the way I am coloring things. So, I was really tickled when I found this weeks tutorial that shares a simple way to add a shadow, using watercolors. this is something I have done in the past with pencils and markers so, it was nice to see it works with a water based paint. I think the main key thing to making it work is letting that shadow layer dry. This tutorial can be seen here on YouTube.

So, I decided first off to just paint a pot without sketching it first and that was pretty slow going, I was not impressed. And I decided to start digging for flower pot dies and I cut up a bunch from Impression Obsession, Memory box & Spellbinders. I have never ever used those Spellbinders pots as the lip/rim of the just does not stick out enough for my vision in my head of what pots "should" look like but, since they come considerably larger than the others I figured they would be easy to practice painting on. ( faster than sketching)

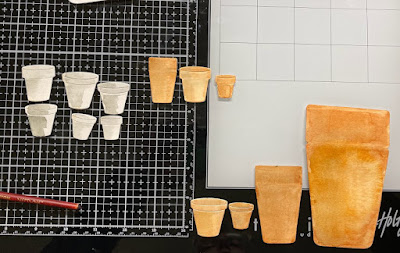
So, after that first rounds of paint had dried I decided to go over the tops of the pots again with more color to see if I could "fix" them, without over working the paper to the point of pilling. Know what I mean? and I think it mostly did look better ( see below) I also added more colors of paint to the pots with shadows with more of a hard edge on them in the top left corner and I still have three pots with just shadows on them to play with some time.

You can click on any photo in this post to enlarge it and then use your browsers back button to continue reading. at this point I decided that I probably should make a project that could you know end up being used. So, the card below was built. I have a little container of strathmore watercolor die cuts that were cut from scraps of other projects in the past just for the whole short cut of painting on them some day. In the past most of them were colored with markers. but, I dug out a couple and used these same paints on a couple of tulips from Penny Blacks first blooms set and tucked them into a couple of pots with a frame from a Memory Box Pine forest frame set.

1 comment:
It's fun to see all of your different size pots. This was a fun challenge. Thanks so much for a short video. My poor connection takes me forever to watch long videos. Your card turned out really sweet. I love the tulips in the pots.
Post a Comment