9.29.2018

Inspired by {Orvis}

This week Anne has directed us to Orvis online, and any time someone says that to me the first thing I think of is fly fishing. ( and gloves) I have a few pairs of their gloves that look like this  a man's small fits me just fine for driving, I have fairly big hands for a girl. 


So, knowing that the very first thing I stopped on was this fly fishing vest. and I knew I had a Karen Lockhart stamp of one so, I was pretty excited. and then I dug out the stamp. and mine must be what a "loaded" vest looks like hahaha. plus it had a plaid shirt, so back to the store and I found this Orange plaid shirt and started coloring.
The orange lawn fawn paper is not so yellow looking in real life. these were stamped on some Neenah desert storm with Versafine inks. the vest was done in Vintage Sepia and the fishing lines were done in smokey gray. ( that is an Impression Obsession stamp) that I placed in the corner of my Misti and then stamped and turned the sheet 4 times to make a big background of it. The happy birthday was done on a scrap of Recollections kraft and diecut with a Memory Box Mainstreet pinpoint tags die. there is a mix of chocolate and natural hemp strings to tie it on as the vest panel is up on foam pop dots.
A closer look at the shirt, I think my husband actually has one this color in real life too hahaha. Thanks for stopping by, you can find this challenge here at SplitcoastStampers to play along with us.

9.26.2018

WOYWW#486 {before & after}

Happy desk peeking day, if you'd like to see more spaces or play along 
the link up for this blog hop starts here at our hostess
There is also a new Instagram hashtag of #WOYWW

So on Monday after work I had stamped off a couple of sheets of the Ellen Hutson mondo holly stamp and colored them with some distress oxide inks and pencils over the top. just random backgrounds.I did cut both the Hero Arts sun and moon dies and they cut the hole so, I used spellbinders circles to cut them away from the cardstock and set them aside. ( it will take my brain a while to figure out how to use those so, they are sitting there to be thought about)  and then I walked away leaving the table to look like this on tuesday afternoon. The blue travel coffee mug contains ice water (when you see the grey one it has coffee in it)

on Tuesday night after work hubs and his hunting buddy were busy until 8 so, I had some free time and I went back up the stairs from the shot I had shown you when I got home and ended up making 5 Christmas cards. they are not all the way done, the insides need lined and I am am waiting for daylight to see if the berries need some white gel pen or maybe some sparkle. not sure yet. the other three are from the pile of smooshed asparagus and they have bitty tim holtz pine cone charms tied on. I did do all the sentiments of all of these in my Misti as I knew I wanted to do them twice on the watercolor paper and without checking on one of the ones ( top right) I did press the sentiment putting the paper in the same spot and haha it went over the "boughs" which looked dorky to me and it got pushed aside. I will have to look at it again in the day light to decide if it will hit the bin or not.
I will be driving all day for work today so making the rounds will come late from me, thanks for stopping by.

9.23.2018

Poinsettia Gatefold

This weeks featured stamper is the talented Angelicia Turner who has a beautiful gallery.
I recently picked up this gatefold die from Spellbinders and it was laying on the table last night and instead of taping to a cardfront I cut one side on a scrap and then ran that through the papercutter to take off the crease side for if you use it as a one layer design. and then I remembered I had these premade bases from DCWV and cut a second one and you know it was after dark so I walked away from it. 

So this morning I started poking around in Angelica's gallery and stopped at this gorgeous card and told myself you know, if you changed this to a gatefold instead of a shaped card that would be one change and that stuff I had been pushing around the night before just might work. So, the other changes are pretty much all the dies and stamps. I also left off the candles and did not decorate the inside. 
 The cover sentiment is from the Tim Holtz great outdoors set, It was stamped on a scrap of PTI spring moss cardstock and cut with a labels sentiment die ( I forgot) the poinsettia die is from Impression Obsession cut with some Recollections red glimmer paper. There are some I'm Amazed Prills in the centers of the petals. the greenery is from the Tim Holtz Holiday Greens mini set. I cut this with some Neenah desert storm & dcwv green.

A peek at the inside that sentiment is from the Concord & 9th O Christmas tree set cut with a stitched rectangle die. Hope you are having a good Sunday too, thanks for stopping by.

9.21.2018

Inspired by {just for fun flags}

This week Brenda has pointed us in the direction of the just for fun flags online store. I seen so many cute things in there that would translate ( for me ) into cards if I had just more OOmph. so, that being said I did find this autumn flag that has all the things I love layers of textures and colors and as I set out to recreated it. more than a couple of changes came along the way.

 Earlier in the week I had received some happy mail from Hero arts in the form of the September my monthly hero kit (sentiment) and this new textured leaves set. my first thought when I seen the leaves online was they would make quick cards with oxide inks. ( and they do) I did use two inks on each leaf inking it with the lighter color all over then the darker shade on the edges before stamping. I was trying to pick up all the color in the IC flag and instead of chalkboard sign for the center I did end up just doing a simple black ink sentiment. Distress oxide colors on this leaf are Old Paper, Bundled Sage, Fossilized Amber, Wild Honey & Spiced Marmalade.
 This card finished out at 4" X 7" in real life.


My first card front that I had stamped I tried to do the leaves up and down from the center and ended up using single colors of ink on the leaves that also included Aged Mahogany &Vintage Photo.in addition to all the ones listed above. This one is A2 in real life on a piece of Tim Holtz orange that has that kraft core to it.
a look at what this flag that inspired this card looks like and where you can find this challenge to play along with us. Happy First day of Autumn! & thanks for stopping by!

9.19.2018

WOYWW #485 {images & shopping}

Happy desk peeking day, if you'd like to see more spaces or play along 
the link up for this blog hop starts here at our hostess
There is also a new Instagram hashtag of #WOYWW
 This is a wednesday morning shot of some images I had colored during the slow times during work on tuesday ( yes, it was an long day) (it's the middle of the month) and I am alone at work again today so, will probably see more of the same but, I intend to grab my pencil storage container thing I cannot think of the name of it of Polychromos today though so, it won't be such a limited supplies challenge with just a handful of pencils haha. I have a pouch of random images to color no real ryhme or reason to it. just things stamped off that I wanted to color.

 and because, I knew this was going to be a long week at work and not really having any playtime until after thursday I shot this on monday night thinking it was all you were going to see. the Sept. Hero arts kit arrived on monday and I had added in some other things ( moon cloud dies that were sold out when I got the african stamps and some carousel animals and new leaves.)  I probably didn't need the leaf stamps but, they look like they would work well with the oxides and not need colored so, I grabbed a set while I was poking around in there.

Sunday there was a featured stamper challenge and this week it is Preethi, who has a beautiful gallery and I happened to stop at this beauty and since this challenge always requires "changes" the point is not to recreate their card as is but, to use it as a jump start for something of your own. So, I really mostly do not have good luck heat embossing on yupo papers and most of the backgrounds I have made in the past just waiting for an idea are alcohol ink ones ( like the scraps you see to the sides those cards are in the post before this one) so, I knew if I made it a card with the heat embossing first and then the coloring that would be one change right off the bat. (and I had this background laying in that pile to the left ;) ) So, other changes were the colors, to make it square and move the sentiment to the left side of the card. 

The sentiment is from the Taylored expressions spectacular set and the background is the Simon Says Stamp Ornate background with some DOX Honey & Lipstick. the butterfly stick pin I picked up a long time ago from Impress. That's about it for me this week, I am hoping to start some fall things this weekend maybe with those leaves, the other side of the kit has dies and one is an oval frame with leaves I think. ( it was the thing that pushed me over the edge on this months kit anyways) So, thanks for stopping by.

9.16.2018

Inspired by {QiQi Gallery}

This week the Inspiration hunting has commenced here inside the QiQi gallery at Etsy
You can find this challenge here to play along.

So, I found this piece ( seen below) and loved every single detail, the colors the textures. and I set out to try this with alcohol inks and embossing powders. the old copper I have is some really old large granular stuff from Stampa Rosa that is similar to Ultra thick embossing enamel. 
( it did not go well with Yupo paper) 
So, starting over I came up with a piece of blues and greens I loved and cut two squares small enough to get two cards from the sheet.

 This is the first one and I used a piece of Shimmery stardream Copper for a raised frame on some pale aqua shimmer base and this one is 6" square. and then it sat like this for a while because, I just love the background and did not want to take away from that.

 So, I picked up the scraps and did this 5 1/2" square version with the other piece. the base on this one is shimmery stardream copper. the blue frame on this one is DCWV and the sentiment panel is from Stampa Rosa and is up on foam dots.

 And then when I went to put them away I happened to see this previously stamped Hero Arts (you're beautiful set) sentiment on the SU sea foam banner and thought those colors work and wiggled it in and called it done.
So, the happy part is the background is still mostly visible.

The beautiful artwork that inspired these cards can be seen here in the QiQi gallery. If I could find a blank space for this it would totally be on its way to me already. :) Thanks for stopping by!

9.12.2018

WOYWW # 484 {Christmas}

Happy desk peeking day, if you'd like to see more spaces or play along 
the link up for this blog hop starts here at our hostess
There is also a new Instagram hashtag of #WOYWW
 So, this is a Tuesday afternoon shot. I had these Spellbinders dies arrive in the mail with some other Amazon things and set them here real quick to shoot this. ( then pushed them aside to start on the IC samples for this weekend, considering I am hosting this week I really should have something to show right? :) ) The card on the way far left is seen below and it was done with some of that stack of Chlorophyll printing onto watercolor paper ( tutorial found here) Basically you just smoosh a leaf inside two pieces of watercolor paper with some paper towels around the outside of that to catch stray drips if you pick a juicy leaf and run it through your die cutting machine. I will tell you I had better luck with thin Canson watercolor paper than the very textured Shizen paper (that sticks together so when you try to pull it apart the paper just shreds)
 So this print was done from the parts of Asparagus plants that go to seed. and it was the thing when I was trying this that I got the best and darkest prints from so, I made a stack of them ( as seen to the left of the glass mat) and I wanted to make them into Christmas cards thinking they looked like boughs so, this one turned out like this, I had originally thought when I dug out this sentiment it was going to get a tiny heart brad dangling from the "branches" but, I think this works too. that heart craft button is really thick and clunky so there is a couple of glue dots under it even though it is tied on with the hemp string. Things are quiet around here again, its such a whirlwind to get back to "normal" of being empty-nesters when your adult child comes home ( and brings his friends) yeah, so mostly I am just puttering this week and trying to catch up on some sleep. thanks for stopping by.

9.07.2018

Inspired by {Paper and Stitch}

This week Angie has directed us to the Paper and Stitch blog where I fell in love with this Valentines day inspired wall display, and said to my self oh, you could do any shape and do it like a patchwork. (that is what I see when I look at this image seen below) so, I started with this Sizzix Tree die.

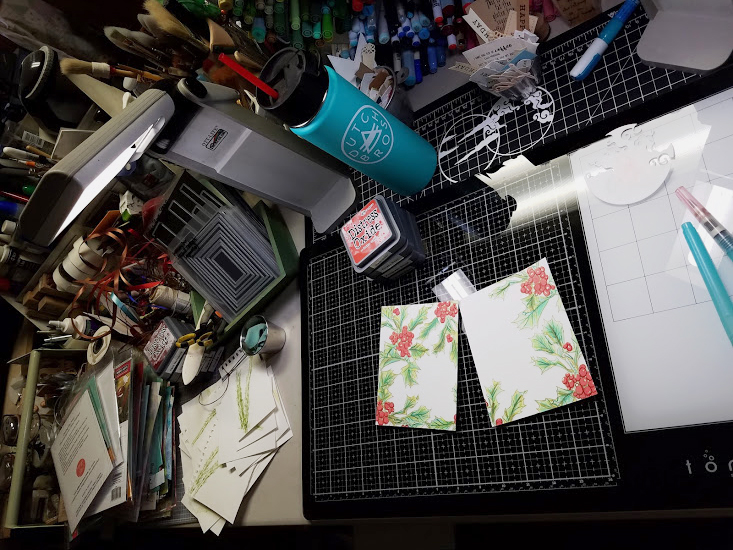
 The sentiment on this one is from Stampin Up Joy  set. the textured paper is unknown and after I cut the tree I then cut it a second time with a Simon Says Stamp stitched rectangle die to give it that one more detail, the green in the embedded part is from Neenah, the sentiment banner die is from Lawn Fawn, I did cut off the left side fishtails. The ink of all these sentiment was Versafine Onyx Black. I have a page protector clear pocket that I have small scale Christmas prints in for die cutting tiny pieces from so all those squares came out of that pocket.


 now this one was done because, I had these negative and spare pieces and I love the texture of that paper that is the tree on this one and did not want to cover it up, I have been hoarding it since the store where I found it closed and I only have a few sheets left so, I really use all the pieces when I do cut one. The base on this one is some Stardream Opal (shimmery cardstock)
The sentiment on this one is from Impress and it was cut with a Hero Arts tall & cute tag die, the brad is unknown. the green mat was cut with a waffle flower Lacy Layers A7 die. This card is A7 in real life.

 This one I used the largest Hero Arts nesting heart die to cut the heart and the Simon Says Stamp stitched squares ( smallest die) to do the quilt blocks. This one is 6" square in real life. that sentiment is from a very old SU set called Joy. The red corrugate is from Fancy Pants the textile print is from Kasier Kraft. That green for the sentiment banner I think just might be a scrap of PTI Moss.

 So, it was one of those third times a charm things, I think this fourth card really nails that IC the best So, it will probably be the one uploaded to the gallery. And I will probably end up making a few more of these style cards as I do have other "heart" Christmas sentiments and tons of scraps I can die cut like this as bitty squares. The woven texture sheet is from Die Cuts With a View, the textile heart is from Kaiserkraft. The Impress sentiment was cut with a Spellbinders labels 58 die.


The blog post for this heart shaped collage of prints on the wall can be seen here in their site. You can find the challenge details to play along with us here at SCS.

9.06.2018

Layered Ornament Christmas Cards

 So, this cool Ornament dies set from Birch Press (radiant ornament set) arrived in the mail last week and I did this top card Sunday afternoon while the guys were fishing. ( sentiment is an older SU one from the and many more set) this is A2. the cardbase is a sparkle cardstock from paper accents. the red glitter frame is from DCWV and I used a Memory Box rectangle tag die for that, the sheet music is from an Patriotic pad from Authentique. The ornament dies were cut from shimmers, foils and glimmer papers. ( dcwv & recollections & I forgot the white already sorry)
and I liked how this turned out so, I cut a few more pieces off and on over the days that followed and just made similar card.

 The sentiment in the center is from the Hero Arts offbeat holiday messages set.

This one the plaid paper is also from that same Authentique pad. the Merry And Bright is from the Concord & 9th Joyful Noel set. the navy shimmer on this one is from Stardream. The round tag die is from the sweet n sassy mini tags die set. Each of these the ornament is tied onto the tag die cuts and so it will remove and could be used by the card recipients later if they wanted to. Thanks about it for me, thanks for stopping by.

9.05.2018

WOYWW# 483 {Tags}

Happy desk peeking day, if you'd like to see more spaces or play along 
the link up for this blog hop starts here at our hostess
There is also a new Instagram hashtag of #WOYWW
 

So, in the People free time I had Sunday afternoon ( guys went fishing) I cut  up that layered ornament die and did this really simple ( card below) every single thing on it shimmers and shines except the sheet music and the sentiment tag. So, it is all blinged out and the ornament will untie from the tag die behind it. So, I liked that idea and cut up some more and off and on since then a few more pieces have been cut and I am just messing around with things that had been diecut previously so, its not anything that "needs" to be done. I did do some others and I did shoot photos of them, but the photos are still in the camera and I intended for them to be part of this post because, I usually have more photos than words haha.

 We still have a few days left with this visit so, chances are I will be making the rounds in slow times at work this week. :) That ornament die is from birch press and its called Radiant Ornaments ( a,b, & c) The sentiment is from an really old Stampin up set called and many more. Thanks for stopping by.


9.02.2018

Kitty Thanks

 One of the guys my son went through boot camp with got married a couple of years ago, and this couple, they are my son's "family" away from home. And I have been working on a thank you box of stuff and wanted to send a card with it all and the only details I got out of my son about things "she" likes are that everything in the house that can be bought in teal is and they have two cats... so, I have known this for days and been feeling kind of blank. I am not exactly sure what "teal" is but, hopefully this is close enough. And then today is the day they reveal the featured stamper at SCS and this week it's Nancy. and she has mad coloring skills and layers papers beautifully so, I kept going back to this one and decided I could make enough changes to make it work for what I needed. I did move one of the circle layers to the belly border layer, and changed the colors and theme. This was done only with papers and diecuts. no coloring.

the center sentiment die was done on some blue ish sparkle paper. ( this is a washed out cell phone shot ) but, you can see the sparkle catchlights. I wanted the cats to look like ( real life ) you know sit where ever they can climb cats so, I did off set them and since its going into a box it got a fancy lumpy Prima flower too. Hopefully they like this. Thanks for stopping by.