Showing posts with label two paper divas. Show all posts

6.15.2018

Inspired by {Vera Bradley}

I had fully expected to be drawn into what ever is the newest paisley prints 
and was surprised to see all the different things they have now.
 
 This umbrella is a retired one from Two Paper Diva's set that was called rain or shine.  (the owners of that store retired a while back and it is no longer available) I had heat embossed this with white powder on some basic grey printed paper and then used grey markers to add some shading to the frame of it. The piece was diecut with a Hero Arts rounded rectangles die. The sentiment is from the Simon Says Stamp CZ love you mama set. and was cut with a Lawn Fawn banner die. The mat print is from My Minds Eye and the base is Grout Gray cardstock. This I used a corner rounder on the corners. This one finished out at 4 1/2" x 6" in real life.

 I had seen this bubble umbrella (below) that reminded me of the one I had as a kid in the 70's and I thought, I do not have any flower stamps with a scale that small enough to fit into one of my large umbrella stamps. So, I grabbed some pitt pens and just made tiny dots in clusters for the flowers and leaves.

12.15.2016

Sparkling Holidays

 Today is the day we say goodbye to the Two Paper Diva's online store. Where the owners will be enjoying their retirement ( tomorrow)
(YAY! I am so excited for you both and hope you will enjoy it so much!)


 So, I wanted to leave you with one more simple Christmas card. This one uses the (sold out) bottle brush tree, a sentiment from the yes to sprinkles set and the star is from the branching out set. I did use my Misti stamping tool to do the sentiment twice on this and also the tree's branches which I had scribbled some Mint Melody & Mint Macron markers on (twice) randomly.

The trunk and base were stamped with some baked brown sugar marker, the sentiment is Versafine lagoon and the star is Versafine Toffee ( which looks gold to my eye) so, I colored in the star with a stardream gellyroll pen and then I added the garland drawing dots with a white gel pen. which totally faded into the branches, so I traced around the edges of my hand drawn pop corn with that same stardream pen and it had a small amount of glimmer, but what made it POP was adding the gold glitter gel pen around the outside of the clear stardream glitter. So, it morphed from "popcorn" into a garland. The frame was cut from some pale green textured DCWV cardstock with an ODBD stitched rectangle die, the gold mirror is from Bazzill and the base is some very pale aqua Stardream shimmery cardstock. and this one is A-2 in real life.
Today is also the last day to pick up anything left on your wishlist in the online store at 50% off. The blog / idea gallery will remain open for inspiration. Thanks for stopping by. 

12.08.2016

Negotiations

I have always been the kind of person who mixes what ever ( stamps, paper lines, embellishments) It doesn't matter if its in my room I have it because I want to play with it. and so, now that we are in the final week of the Two Paper Diva's online store being open I decided to share this one because, it is very much a Me project. This is one of the cards I put together on Monday for the lady who needed something funny for Christmas and she did choose this one. The stocking is from the Holiday Greetings set and it really is my favorite image in that set. the shape of the stocking is just fun to me, this version was water colored with some pencil over the top. The circle was pressed with a Sizzix basic grey folder and the sentiment is from the ranger dylusions line. the printed paper is from a Bo Bunny pad with lots of little vintage Santa images and the card finished out at 6" square in real life. that ribbon is unknown. I did use a teeny recollections gold brad to "hang" this stocking with, the cord is tucked around the prongs of the brad and taped to the backside of the stocking.
 There are just 6 days left to take advantage of the 50% off remaining inventory sale.

12.01.2016

Handy Guy Stocking


Can you believe it is December already? where does the time go? and speaking of time flying, The Two Paper Diva's online store will close on Dec 15th. So between now and then everything in the store is marked at 50% off through their store front. You can read the details on the store blog here.
This particular card the Stocking is from the Holiday Greetings set, it was paper pieced into this card the blue part is colored with some Sparkle noir glitter pens ( I did dilute that with water in a paint well) because, what I have found with those brush tip markers is they leak and they don't do it in drips they do it in huge start over again from scratch puddles... so, I drip some into a little plastic well and then pick up the colors with an aqua brush. ( and that keeps my fingers slightly cleaner too) 
The sentiment and the nail are from the You are a handy guy set. I did deliberately stamp the nail off set so it could be "hung" with the scrappers floss, when I read that sentiment it tends to make me think of duck tape and bailing wire lol. So, I did add some clear gelly roll glaze pen to the nail image too.

The toe, heel and cuff on this stocking were colored with a prisma pencils real quick after the blue sparkle was paper pieced on. The inks these were stamped with are Versafine Onyx Black. the Plaid printed paper is from Lawn Fawns winter pad and this finished out at 5" square in real life. Thanks for stopping by and have a good day!

11.24.2016

Holly Framed Christmas

 Good Morning, and if you are in the US and celebrating today, Happy Thanksgiving. I know this should be a Thankful post and the truth is for me Thanksgiving is the only 4 day weekend we have off from work during the year so, its also when the bulk of the Christmas cards I make for my family and friends start to happen. And for that I am thankful to have that time off, I get away with being in my studio because, the guys have gone pheasant hunting at ohdarkthirty, so I am able to get a lot done before the sun even comes up. A while back I had the Holiday Greeting set out from Two Paper Diva's and I stamped and colored a lot, (I didn't count) sheet filled with the holly leaves and berries. and I water colored them and traced over some of them with different pens and cut them all out with scissors. and I filled up a little baggie with them. when I first started this card I had intended to frame this greeting from the Mason Jar Accessories set 2 completely with the holly leaves because,there are enough of them but, as I made it around the curve of the oval ( Spellbinders radiant rectangle die) I decided I really liked how it looked with just the one end covered. the "berries" are some queen & co. goosebumps. for a little bling.

This ribbon is a recent Micheal's find and its wrapped around the front of the card and taped to the chatterbox print under the die cut. This stamped panel is up on pop dots over that for a little depth. This one finished out as 5 1/2" square on a pre made Die Cuts with a View base.
When I linked to these sets they were both still listed as in stock and are currently 40% off with the retirement sale discount, no coupon codes needed. 
So, just a quick and simple one from me today, I hope you all have a really good holiday with your families, & Thanks for stopping by.

11.17.2016

The Light


 Good morning, today I am sharing one more simple Christmas card where the twist comes in on the non traditional colors ( for me) It's one of those things I really have to twist my arm hard on to not do red and green ( because, that is my favorite) and I do have one friend whose Christmas decor is White and Purple. So, with that in mind my colors were inspired by that. This is a single stamp from Two Paper Divas called You are the light 
It was stamped with Versafine ink and colored with watercolor markers. This panel was cut with an
Our Daily Bread Designs stitched rectangle die and has some satin ribbon tied around. I don't remember the color name of that Gingham print but, I got it from close to my heart a long time ago when they sold packages of just gingham. The base is bazzill and this one is A-6 in real life.

A closer look at the colors. There is a tiny amount of bling on this but, it was being camera shy. The Two Paper Diva's retirement sale continues and everything is currently 40% off store wide. you do not need a coupon code to get the sale price. Thanks for stopping by.

11.10.2016

Light of my Life

Good Morning, here is another simple Christmas or even just a love note idea using a couple stamp sets from Two Paper Diva's. This candle from the holiday greetings set was stamped with versafine ink on some smooth Neenah solar white and cut with a stitched rectangle die. This was colored with some Zig clean brush markers, Distress markers and a gold gel pen. The sentiment is from the Watt's Up set and this panel is up on foam pop dots over the mat. The gold sheer ribbon is unknown but, maybe offray? and that gold ornamental brocade print is from The paper co. I used some coredinations for the base and this one is A-6 in real life. Both of these sets are still in stock and the retirement sale is continuing at 40% off with no coupon codes needed, it will come off when you put things in the cart. Have a good day and thanks for stopping by.

11.08.2016

Each Moment

 I have been making Christmas cards left and right lately and also heat embossing seems to be the "thing" for me at the moment. I go through long periods where I don't want to bother with the mess and then all of the sudden. all of the stamps get done this way haha. The wagon was done in liquid platinum powder from ranger and the branches of the tree & sentiment were done with Stampin up old fashioned olive powder. The star at the top was done with WOW gold on some gold mirror paper & These were all cut with scissors. I did color the wagon with some zig and distress markers, the tree's post and base were done with some Versafine vintage sepia & Olympia green inks.


The tree is from the sold out Bottle brush trees set, The little red wagon is a single stamp, The star is from the Branching out set, and the sentiment is from the Everyday sentiments 4 set. That stripe paper is from Basic grey and the kraft postage stamp frame was cut with an Avery Elle die, the base is textured bazzill and this one finished out at A-6 in real life.
As of this morning the retirement sale for Two Paper Diva's has been bumped up to 40% off store wide. 

11.03.2016

Birthday's & Thank-You's!

 Good Morning, my studio has gone into serious produce things quickly for the booth to fill up those baskets, tray's and suitcases for the next couple of weeks so, I will have posts with multiple ideas in them for the next little while. This one was done (because, I really need more Christmas cards) you can see that right? that the can being gingham and paper pieced onto the wood grain would become a rustic watering can display right? ( and then the more I looked at it the more I thought this needs to be a Birthday card instead.) The can & flowers are a single set from Two Paper Diva's called Bloom Wildly. and this sentiment is from the new Everyday sentiments 4 set. This ribbon is from May Arts, the gingham print is from Authentique "wonder" pad, the wood grain is from My Minds Eye, the Cream is from Papertrey ink. the oval was cut with a simon says stamp stitched die and the sentiment was cut with a nellie snellen tags 3 die.

 A closer look, the Flowers were colored with water based markers on the Neenah cardstock and the centers of the red blooms have some white gel pen on the dots and the centers of the gold blooms have some kaiser craft half pearls on them. This card is A-6 in real life.


 Now this is something I used to do a lot of and did not do too many this year along the way. 3X3 sized notes. And it was the first thing I thought of when I seen this grater inside the What's Cookin' set. I had once upon a time found these vintage metal graters and I used them as great big gift tags for a couple of our friends one Christmas a few years ago. Each of these graters were heat embossed with Ranger liquid platinum powder on either a double sided grey scrap or solar white smooth ( Neenah) with the dark grey because it is two pieces of 110 stuck together I found I could not cut the inside of the handle with a gryo cutter tool. so, I ended up taking the top corner off the right side of the bottom left grater and then heat embossed a second grater onto that white card to paper piece it into place. on the one stamped on white they are colored with a zig clean brush and the other dark grey ones have some white gel pen inside the ( under the handle) The bases on these are all textured DCWV card and the lacy edged one was cut with a spellbinders die. so, they are similar and not exactly the same.

This one also uses stamps from the What's Cookin' set. the grater, colander & whisk were all heat embossed with liquid platinum powder, the spice jar was embossed with Stampin stuff terra cotta powder, and the bowl was embossed with SU old fashioned olive powder. These were colored with Caypso Coral, Bordering Blue & Peeled Paint markers. The crochet lace is from May Arts, the stripe paper is from the jillibean soup Christmas eve pad, The sentiment was stamped on some papertrey ink cream and die cut with a conversation bubble die. This one is also A-6 in real life. And each of these sets are still in stock as I linked to them this morning. The percent off sale comes off automatically and you do not need a code to take advantage of it. Thanks for stopping by.

10.27.2016

Out on a Limb

Good Morning here is a clean and simple one using a couple of sets from Two Paper Diva's the bird is from the feel better and the limb and sentiment are from the Branching out set.  I was just pushing around this bird and limb around and actually remembered I had this paper and thought maybe the leaves would work. And so it did. The bird was colored with SU markers and a ranger white marker (for the eyes). I did paper piece those leaves onto the limb. The end of the branch is tucked under the window on the left and the bird is up on foam dots over the limb. I did use my misti to add the sentiment to the bottom of the card. I kind of laughed that the colors turned out so pretty and springy. seeing as it is seriously fall here now but, its kind of fun to mix it up and do things out of season some times too. (a small break from the Christmas is coming mindset) This one finished out at 6" square in real life. Thanks for stopping by and remember the entire Two Paper Diva's store is 30% off while they get ready to retire. when I linked to these set's this morning they were both still in stock.

10.21.2016

Hello there Chickie

Ah, I just realized it is friday. Which sounds funny because, yes I did know yesterday was Thursday and if you are used to peeking in for a Two paper diva's fix I totally spaced uploading. So, this one is a day late. sorry. The twig & berry wreath was heat embossed with Ranger Adirondack butterscotch powder on some cream cardstock and then after I added on some Candy cane colored stickles. the bird is from the fall is in the air set with the pumpkins and leaves. and I did add some nuvo glitter drops to the birds eye. The sentiment is from the new Everyday sentiments 4 set. The textured base on this is from Bazzill and this one is A-7 in real life.
At this time the items left in the store are all 30% off as the owners will be retiring by the end of the year. From what I seen as I linked these up this morning all these sets are still available.

10.13.2016

Use your Wings

One day I was just playing around with some of the Two Paper Diva's stamps I have not inked to see what could happen and this was one of those things that kind of fell together. The Hello & dotted cup are from the Stuck on you set and the Owl and Hat are from the Wicked Wear Accessories set. These were all stamped direct on the printed paper and colored with some SU markers, & gel pens. The use your wings is a Tim Holtz sticker from the small talk pad and I did ink that with an elegant eggplant marker. The fibers are unknown and the Text print paper is from Amscan and the dotted is unknown. I did use some spellbinders A-7 Mat dies to cut these, and then I just off set the whole thing to the right for something different. The base on this one is A shimmery one from Stardream.
By now you may have read the story of the pending retirement of Two Paper Diva's if you missed it, you can find it here. Currently everything in the store in stock is on sale for 25% off. and things will not be restocked as they sell out if there are some things left on your wish list.  

a peek at the glimmers

10.07.2016

Celebrate the little things

 Sometime right after I had made the card I showed you all yesterday with the single letter in the Mason Jar. I had been skimming on pinterest and came across a shot of a shadowbox that was made for boot camp letters. ( of which I have a pile) and since all the stamps and powders were still out from the first card, this second card took shape really quickly because of it. So, that was the initial inspiration piece for this card. The letters are from the Sending a little note set, the Mason Jar is the larger one in the pair of two and the sentiment is from the Celebrate life set.


A closer look, the lid was heat embossed on a dark grey scrap with some ranger liquid platinum powder, the Jar was heat embossed with white on vellum cardstock and (both these pieces were just cut with scissors) the Letters were also done in the liquid platinum and the hearts were colored with a triliner pen. the Printed papers are from a Kaiser craft Home for Christmas pad and the outside woodgrain part is up on foam popdots for some depth to the "shadowbox".  I would have stuck this card into the same post with the others but, nothing in this particular one was from the October release and so, I decided to post it anyways just all by it self since this is one I love how it turned out because, I am very sentimental you know. Thanks for stopping by.

10.06.2016

Two Paper Diva's October release {day 2}

Welcome to day 2 of the October new release from Two Paper Diva's. Every single thing in the store is at 25% off and you can find all the new release items grouped together here in the store.

 Now this is something I just love the newest everyday sentiments set 4 the font is a typewriter style and they are all little in size so that they can be diecut or punched with a lot of things and tied on or part of a design and not take center stage. This particular card is A-2 in real life, the Mason Jar was heat embossed with white powder on kraft for the jar and the lid was heat embossed with liquid platinum on some pale gray cardstock and the sentiment uses the same ranger powder on it. The envelope is from the sending a little note set and the heart was colored with a staedtler triliner pen ( which has a very small tip) The envelop is dangling from the lid with a piece of scrappers floss.

 This card uses the new Fern set which includes the bitty dragonfly and the new Everyday sentiments 4 set.  I stamped the Fern's with Olympia Green Versafine ink and the dragonfly with some Avery Elle thistle ink. These were colored with Polychromos and prisma pencils with a little bit of stardust gelly roll pen on the wings of the insect. I cut that panel out with a Spellbinders A-7 mat die and tied on some old ribbon that is really close to mellow moss in shade. and found this old print from Basic Grey that looked like it had been made to hold this image. This one finished out at 6" square in real life.

I have read many times over the years about people coloring things to match their papers. and I always think wow, that must be a lot of work. and I colored this house from the new My Neighborhood 2 set and thought lets do something simple so I only colored the roof and door and added a smidgen of yellow to the insides of the window panes. and when it came time to make it a card I started flipping through my 6" pads of paper I fully intended this house to be a Christmas card and I came across this My Minds Eye cozy Christmas pad and laughed and laughed. I could not have matched these colors any better if I had tried. ( see, there is a good side to collecting all the pretty papers) The house was stamped with Versafine on some smooth Neenah solar white as was the sentiment, the frame was cut with an Avery Elle postage stamp die and that is up on pop dots. This one is A-6 in real life. Thanks for stopping by :) and have a good day!

10.05.2016

Two Paper Diva's New Release {day 1}

Welcome to day one of the newest release from Two Paper Diva's. Today one of the ones I am sharing goes live and I will have a second post tomorrow with the others. This one is something that just made me squeal out loud when I seen the design was coming as my son lives with the idea that pop corn is the 5th major food group. ( seriously)

 So I started with stamping the bowl of pop corn ( and the scattered pieces to the sides are part of the design like this) and coloring it with some prisma pencils and stamped off a second one to have extra pop corn for layering. the circles were cut with some memory box stitched circle dies.

 A closer look at the dimensions, the extra pop corn is only in the bowl and up on 1/16" dots.
The outside frame is up on 1/8 foam thick dots and the center stamped panel is on 1/16" ones. so, it is a little countersunk into the design and I am hoping it will do well through the postal machines.

The plaid paper is from the newer fall plaids from Lawn Fawn and the base is bazzill this one finished out at 6" square in real life.
The sentiment on this is from the new Everyday sentiments 4 set. Every set in the new release along with anything in the store is on sale at 25% off.

9.29.2016

2016 Fall Coffee Lovers Bloghop {day 7}

 This fall themed blog hop continues, you can find the links to play along here. All you need to do is a coffee, tea or cocoa theme with a fall spin on it and link it up. If you don't have a blog you can choose an online gallery , flicker, instagram the social media tag is #fall2016clh
There are 63 sponsors of this hop and the eye candy along the way is just so much fun to see esp. when you find someone who has used some tool you own in a brilliant way. 

This particular card uses stamps from Two Paper Diva's the mug and more that was part of the September new release was paper pieced from a piece of graphic 45 print and the sentiment is a small sneak peek of a set that is coming in the October release coming out next Thursday called everyday sentiments 4. ( I will edit this post with links later after the set is live) but, I can tell you it is a collection of small scale type font sentiments. ( so a very useful set for me as I love to tie on the words with ribbons and lace) I cut this sentiment out with a Sizzix Tim Holtz tag collection die. and it's tied on with some Karen foster scrappers floss. The base of this card is Gina K designs faded brick and that was run through a SU seaside folder for the wave texture. The wood grain printed paper is from Kasier Kraft and the edges of that panel were inked with some yellow chalk ink. That panel was run through my sewing machine to attach the lace.
This card is A-2 in real life. I am hopping along very slowly during the down times this week as my son is home on leave, Thanks for stopping by.

9.23.2016

2016 Fall Coffee Lovers Bloghop {day 1}


 Good Morning and Welcome to day one of the Fall edition 2016 Coffee Lovers Blog Hop.
(you can find the link up to play along here at the Coffee Loving Cardmakers blog.) There are 63 sponsors of this hop so, the talent level and eye candy is over the top awesome. To play along all you need to do is create something with a coffee, tea or cocoa theme.The social media tag for this hop is: #fall2016clh

 This is a quickie cell phone shot to catch the glimmers. I seem to have better luck with the cross lights on a flat laying card than set up shots by the window so, the cell phone tends to over expose the colors but, you can catch the masking and details of this angle right?
I was aiming for that look you see when people paint the clear jars to look like milk glass. and I grew up with people in my families having labeled canisters in their kitchens. so, this was kind of a combination of that . I have also seen you know lace on the edges inside country cupboards so, these layers were run through my sewing machine.


 Another cropped view, the lids were heat embossed on scraps and cut out by hand for this, the mason jars ( all sizes Two Paper Diva's makes are masked onto one piece of Vellum card stock and also cut out by hand) The Mason Jars And Large Mason Jar from Two Paper Diva's were heat embossed with ranger enchanted gold powder and the Lids were done with Liquid Platinum powder. (as were the sentiments from the Keep Calm & Drink set.) 

The finished size of this one is A-7 in real life on some spring moss from PTI & the vellum and vintage cream (liner) are also from Papertrey ink, the print behind the jars is from Diecutswithaview and that plaid is from We are memory keepers autumn splendor. the lace is vintage, the button is a craft one and the holes were filled with scrappers floss. ( I love that stuff its way easy to thread in bitty holes because, it is stiff not like a textile cord that would just flop and fray on you) The keep calm and drink part of the sentiment was die cut with a fishtail die. If you like what you see here and have been meaning to add some TPD to your collection There is a site wide sale during the hop for 25% off everything, you don't need a code it comes off automatically. YAY for it being fall. :) I am going to wear a sweater to work today :) and will be slow to hop, our son is home on leave so, the down time is not as much as normal for me. Thanks for stopping by!

9.15.2016

Fall is in the Air {finally!}

Good Morning, its been in the lower 30*'s here every morning for a week. which this body mentally yells YAY! lol triple digit weather is really good for the garden but, not me.
not at this age anyways.
So, I have been greatly anticipating the arrival of fall. 
 

 These cards all use pumpkins and sentiments from the Fall is in the air set from two paper diva's and this one has an addition of the twig and berry wreath heat embossed and covered with nuvo glitter drops. This panel was cut with an large cross stitch square die and the Sentiment was cut with a Mama Elephant slim tags trio die. This panel is raised up on foam pop dots. The brad is unknown and I did tie a piece of scrappers floss around the stem of the squash because, fussy cutting the swirly vines is beyond my patience level. so, you'll see the ones in the cards below I drew on some random swirls.


 One of the things I had done was scooped up some fall colored scraps one day and just started looking at the print scales to see if any would work for pumpkins and then I stamped and cut out a stack of them. I did add some chalk inks and glimmering pastels to them too for a little more color.

and a few of those pumpkins became very simple fall note cards. All of it was stamped with versafine vintage sepia ink. ooh and Remember next week there will be the fall themed coffee lovers blog hop. Two Paper Diva's is one of the sponsors and there are so many cool companies that participate in this one. ( many many gifts are offered too)

9.07.2016

WOYWW # 379 (new toys)

I am going to lump these two posts together because, I need to run out the door to work and it all kind of goes together anyways. what I have on my desk ends up being what I make right? If you have not stopped by on a Wednesday before you can find all the details of how to play along with us here on our hostess Julia's blog. 
(this is a consolidated post )

 On tuesday after work I had received a packet in the mail from Simon Says Stamp so, as I was opening things I thought maybe you'd all want a peek at it. Some of these are "stamptember" stamps, which means if they sell out they dont restock them ( and I had no clue about that a few years ago I posted a patriotic card I bought the stamptember stamps from them and I had a million emails about how to find the stamps in their store.) So, if you get  chance go look earlier in the month than later. (also they are doing a HUGE give away)

 We had a 3 day weekend last weekend for Labor day in the states and a whole lot of my time upstairs was spent cleaning for real. ( ha, you can see I own a Misti again lol)
and no, I still have not got that stamp cleaner from LF wet yet... I keep thinking what are you going to do with it after? since it would be wet, hang it to dry? take it downstairs and wash it each time? so, the thinking about it continues.

 Off to the right the perpetual scrap pile is still in effect but, a whole lot of them were filed.

 Today is also day 2 of the Two Paper Diva's new release for September, and I had stamped and cut out these cups a while back thinking to do some kind of a row of cups hanging in a cupboard and then when I ordered the postage stamp dies I knew it would be iffy if they would arrive in time so, I cut that die twice and popped up the center piece for a extra oomph and instead of hanging the cups which is what I thought I was going to do. ( teach me for thinking ahead) I ended up cutting slits with an Xacto knife to stack them.

So, that trim is vintage and it just looked like something you would find in a country cupboard and It has no words. because, I am not sure how I will use it yet. but, you can find this set here. and all the new September stamps here together. ( they are on sale too!) Thanks for stopping by.

9.06.2016

Two Paper Diva's September Release {day 1}

 Now this is the most exciting tree stamps I have gotten my hands on in a long long time. ( in my mind anyways) I love those little bottle brush trees. ( I even buy them) and never take them out of the packages lol... so, When I seen this set was coming it was an Oh, what a cool idea. These are both A-2 in size and were stamped on kraft with Versafine ink.
The snowflake tree was stamped repeatedly with the green ink so, it looks a little "fuller" in the bough's.
 The flake at the top is a dress it up button and the bitty snow on the branches are actually simon says stamp flower sequins. The snow under both tree's is some handmade mulberry paper that I tore the scrap on a diagonal to give it a hill of snow look. and just reversed the scraps and wrapped them to the back sides of the stamped panel to tape it down. ( so, its a little fluffy on the front)


 The star on this version is a button that has scrappers floss in the holes and the sentiments on both of these cards are from the Everyday Sentiments set. The stamped panels were cut with stitched rectangle dies and are up on foam tape over the cream cardbases.

 another version of these tree's. this one is the smallest tree stamped with versafine (deep lagoon and vintage sepia) over a digital print out of the large mason jar on copy/printer paper. I did color dust the white paper to pale blue trying for a watery look like a snowdome. ( have you seen people make those with these tree's?) I am honestly too lazy to fill the jars an do it so, the stamped version works for me. The shaken snow inside the dome was done with nuvo glitter drops. At the time when this was done I did not own the large mason jar as a stamp by it self so, I used the lid to the smaller jars for the cap on the bottom. there is some burlap string tied on there with a snowflake button and the sentiment is from the Winter Welcome set. The printed paper is from Echo Park times and seasons pad. This one is also A-2 in real life.


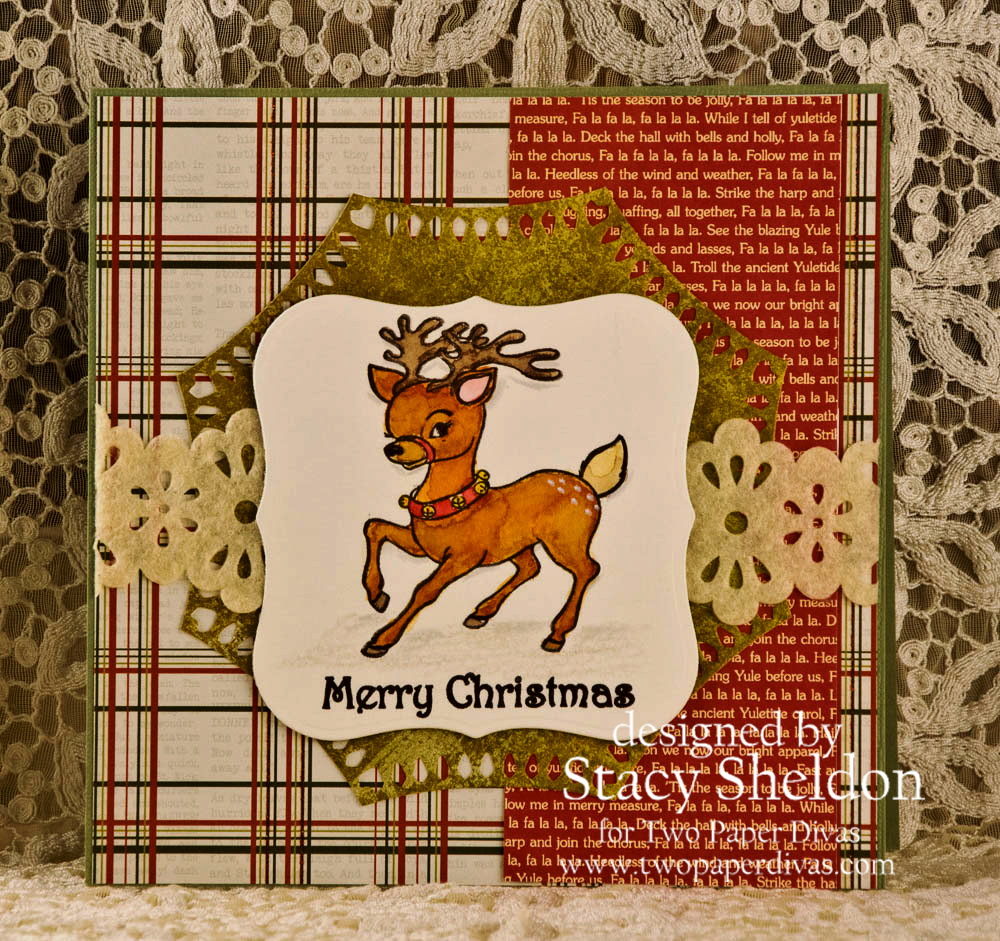
 Now Dasher just made me smile in a happy memory retro kind of a way. ( I like that kind of thing) so, to me he looked like he should be flocked but, since I took him camping a couple weekends ago, he got watercolored instead.

 This one is 6" square in real life, the dasher panel is Strathmore watercolor paper and was cut with an spellbinders labels 1 die and matted with a labels 41 elements die using Basic Grey green print, the felt ribbon was something in the Micheals Christmas bin a couple of years ago. the text printed paper is from jillybean soup and the plaid is from My Minds Eye cozy Christmas ( so it has a slight bling to that paper) The Merry Christmas Sentiment is the one found in the Mason Jar Accessories 2 set.

 This Santa's name is HO HO HO. He was also a let's color him in the camper version. I knew I wanted to do something "different" and since my first thought for Christmas without fail is always red and green and gold. followed by kraft and creams... the purple for the outside edges was a totally out of the blue decision. I did color his face with copic markers (because, I don't have the patience to mix watercolors for skin tones in a "good" way yet) So, now you know where I am on that learning curve still lol. This sentiment is also from the Mason Jar Access#2 set. The water color panel was cut with a Taylored Expressions labels stack3 die, and at first I thought to make this into a gift tag, so, I cut another piece from plain smooth Neenah for a frame and then a solid piece of scrap corrugate for the back to give it some stability and then I decided to make it a card instead and I kept the corrugate on the back side for a very slim dimensional rise over the base. The big brad I believe may be from SU. ( all my round metal brads are in the same jar together) This one is also A-2 in real life.


You can find how the team used these same stamps here on the store's blog post. There are 13 sets that released this month so, the others will follow tomorrow. You can find all the new sets here in the store. and they are on sale too! :)