8.28.2019

WOYWW # 534 {Foiled Christmas cards}

Happy desk peeking day, if you'd like to see more spaces or play along 
the link up for this blog hop starts here at our hostess
There is also a new Instagram hashtag of #WOYWW

 This is a Wednesday AM shot of the desk, those foiled pieces were done over the last weekend and that is as far as I got with them, the 4th one was turned into a card and its the one in the very bottom of this post. The solid green piece is dyed cork paper, I had thought I was going to use it with the foiled green card because of the texture contrast but, ended up changing my mind. The paint is there from that stenciled debossed tutorial I tried a few weeks back the one that turned out better is under that pile of clear blocks. The random sentiments were stamped on scraps to cut and use later they are "drying" ( well, they are probably done dried by now its been hot here too hot to go up and play after work. there are more of them on the paper cutter to the right that you cannot see in this shot.)

 This is how that first opal foil on the red turned out, I did cut out the center as the foiling showed off how uneven I had gotten the paste.

 Now this one I probably should have just tossed it, but I have a hard time doing that. and for the most part I like rustic and distressed things but, with the stark white background these red poinsettia's I think need to be perfectly foiled and would be more elegant. So, I had the bright idea to cut some off using it to try last week's sketch. but, I really do not like how this finished out and I may just toss it yet.

Now this was one of the pieces that got foiled last weekend. and I was so excited that it looked perfect when it was done. ( I used a shim and only ran it through the laminator once)
and then when I went to make it into a card it kept flaking. so I took a paintbrush and ran that over it trying to knock off what ever was "loose" and now, its not perfect anymore. ( and I have a feeling it will just continue to flake over time) these were all done with the foil transfer paste from deco foil along with their foils.

Part of me is very tempted by a glimmer machine or a what ever the gemini version is called.  ( I did watch some video's of them being used last weekend too) and somehow I did end up with one foiling die from the last time I went into hobby Lobby and that is what I think sparked this whole how do you use this stuff adventure.
the pro's for the gemini version is ( its cheaper and I have a gemini Jr machine already)
the pro's for the spellbinders version is supposedly you can use other brands of regular dies in it. ( of which I have a ton of regular dies) (but, I do not know how this machine will run through a bigshot Pro and I have a feeling it will not fit through the old spellbinders pink shoot what ever it was called that only took slim dies through it machine?

(and I really do not want to have to buy another die cutter.)

So that brings me to the burning question I have. Does anyone actually have either of the foiling machines? do you really get perfect results with it or are you still killing a lot of paper in the learning curve?

That's about it from me, thanks for stopping by.


8.27.2019

A Bridal Shower card

My Niece Ashley will be married this coming October and knowing this when I seen this Curvy bride come out form Stamping Bella I got really excited to color her as I am thinking with that hair updo her hair goes all the way to her hips just like Ashley's does.

This was a first attempt at coloring her and I had no clue about the wedding colors when I started this but, I have had her colored for months and then the invite showed up for the shower an it was 5 days notice and I wasn't quite steady enough on my feet to start over so, I decided that finishing her off as a Clean and Simple design was just going to have to do it. This sentiment is from either Savvy Stamps or Impress or A Muse (and it's probably retired because, I cannot find it anywhere online) The stamped panel was matted with some brushed silver metallic cardstock and this was mounted on a deckle edge strathmore Watercolor pre-made card base. (because, I loved the textures)

Her skin was colored with copic markers and her dress and flowers were done with polychromo's and Prisma pencils. Just a closer look at her, I decided to do a soft pale pinkish peach for the shading on the gown as grey's or blues seemed to cold for a white dress at the time. I did enjoy coloring her and I am hoping to do another one sometime for the stash / booth in November. Thanks for stopping by.

8.23.2019

Inspired by {Corningware}

This week the Inspiration heads to Corningware.
Which was a surprise to me to see that it is being made and I had fun poking around in the site & was surprised to see the pattern I bought some of as a new bride is still being made ( French white) 
Hubs and I both have inherited pieces of the classic Blue cornflower pattern too, so we have some of that and some of the old pyrex mixing bowls in the peachy pink & white with scenes and the pale aqua blue & white scenes. refrigerator dishes and the like. 

 Today's card was inspired by the European Herb's pattern as when I first spied that I said to my self, hunh that is grey and yellow. ( Which I was told will be Ashley's wedding colors) and these are not colors I play with much so, I decided to try this as a practice run of messing around with them.
(no, this will not be her wedding card but, I do like the fall feel these colors give me since that is my favorite season)

 A closer look at the petals, I did ink this Penny Black All you need with some distress Oxide fossilized amber ink and then scribbled some tombo #603 (purple) marker on that while wet and stamped that way the purple became a shade of grey. the background text was stamped with some DOX Pumice stone and I did add some carved pumpkin dox to a few of the petals after it had dried too.
This dish can be seen here in their site and you can find this challenge here to play along with us. Thanks for stopping by.

8.21.2019

WOYWW #533 {Foiling take 2}

Happy desk peeking day, if you'd like to see more spaces or play along 
the link up for this blog hop starts here at our hostess
There is also a new Instagram hashtag of #WOYWW


 So you may remember that I collected some foiling things ahead of dtgd and I had watched a video from Jennifer McGuire a while back and in my head I had the gist of what to do with these things.
the one thing it says on the jar of this deco foil paste ( for smooshing through stencils) is to not let them dry on the stencil. ( so there is a hall bathroom right around the corner from the laundry room and I figured that sink was close enough) what I didn't anticipate is our summer humidity here bounces around from 10% to sometimes as much as 20% so, on the second one I did since it was a longer stencil, It did dry on me, and I could not clean it off following the directions ( cold water and dish soap)  anyways back to this piece. somewhere hiding in a very safe as of yet undisclosed location in the cave ( er, studio) I have a really long bladed plastic spatula I picked up a long time ago for doing brass stencils with paste and evidently I moved that container where that tool hides so, I grabbed a short paint one and it was an adventure using it in the center of this one. ( I told my self I own circle dies if push comes a shove I would cut it out)

 The one on the left has a tim holtz poinsettia stencil drying on it.
And farther to the left of that is a box that arrived from watching the tv commercials a few days after I got home from the hospital there was one of those all day things on hsn. and my mama had texted me are you going to watch? and I really wasn't I actually forgot about it and then after dinner I was flipping through the channels and seen this todays special at that time was these pens that are for foiling that you could use your rubber stamps on the backside of the foil and trace the pattern with these pens and instant foiled stamped image. ( oooh you guys have seen a part of my stamp collection which is you know much larger than my stencils) and so the possiblities of this had a lot of apeal to me and my husband was no help, he is just like oh buy the things. So, by the time I caved and ordered the pens and the battery pack thing the metal magnetic sheet with magnets had sold out. (you'd think they would just put all the things you need into one package and say it cost's 100.00 instead of breaking it up in pieces and hoping you get all the parts right?)
(as of yet all I have done so far with that is charged the battery pack thing with a cell phone charger and since it does not tell you what it should look like charged I am not sure its done yet)
So then this is what it looks like this morning before work. the one on the red cardstock was foiled with Opal foil and the one on the white cardstock was foiled with red. and then I went on line and seen that ha ha she has more video's and the next thing to try is to use parchment paper instead of printer paper for the carrier sheet in the laminator and or to run it through the machine twice. and to let the laminator re heat for another 20 minutes between pieces, I ran these through back to back so the red is missing spots in the petals and the lace one actually looks pretty good and solid for one pass through the machine.
and I probably will cut out the center of the doily piece since the lines of the paste are pretty visible.
That's about it for me. I am continuing to feel better and better each day. I have not taken any mug shots of Izzy this week but, she did go get the last round of puppy shots yesterday and she now weights a bit over 40#'s. ( so, growing like a weed continues and so will the teething for at least two more months) she has decided she likes chewing on ice cubes and if someone is getting ice out of the refrigerator she will run to the kitchen to beg for one. Thanks for stopping by.

8.18.2019

A two-fer (challenges that is)

 This week's featured stamper is Donna and I came across this pretty card this morning and my first thought when I seen it as a thumbnail was oh, cool vellum flower. ( it really isn't but, the color combo of the design gives it that illusion as a small photo) but, because it gave me a first "change" I knew I could wing the rest of it into working. the center panel was done following the acrylic stencil deboss and (there is a closer look below) and the other changes are there are less layers and instead of a banner I tied on a ribbon and dangled a sentiment from that. This one finished out at A2 in real life.

a closer look at the acrylic stencil deboss ( the tutorial for this hide's here) and the cool part is, your stencil stays clean. this is the try a new technique challenge from last monday at scs and its been in the back of my mind all week to try. This was my first attempt and I did use an old cut pad in the big shot and went back and forth trying to get the leaves to bump and then did use some felt along with a tan rubber mat and I did crack the cut plate. ( it was old and warped anyways) but, then I grabbed a second sheet and tried it without the felt and got a slightly better impression but, because this one was first. its paint dried first and I knew that a lot of it would be hiding behind the bloom and I used it instead of the one where the technique really shines. And I really will do this some more. my stencils and paint collection is not all that extensive so, it seems to me that no matter what the challenge is my things tend to all look the same. one of these days I really should buy more colors of paint :) thanks for stopping by.

8.16.2019

Inspired by {Painted Jars}

This week Brenda has chosen Painted Jars on Pinterest as the inspiration. and I came across this jar seen below rather quickly and knew that I could use it to jump start some Thank you cards I needed.


 I started with this one for my Husband and a piece of Sahara sand cardstock from SU, I ran that through a we R memory keepers wood grain folder and then smooshed a little country (off) white paint over the top with a foam brush. to give it a little bit of that white washed look.  The sentiment is from the Simon Says Stamp Thanks and Leaves set which I had not inked before this and the frayed edge ribbon is something that came from Micheal's the last couple of years in the fall. the brown string is actually May Arts burlap cord and the bloom I think is from Prima. ( I have all my fancy flowers in jars on the wall so, I do not have any packaging info anymore for them) The tiny tag diecut is from Hero Arts and this one is finished out at A2 in real life.

 A peek at what is on the inside. ( those sentiments are also from that same stamp set)

 And since it worked so well, I just used this as variations on the theme. This one has some prima leaves tucked in with glue dots.

 And these two went horizontal with some wide crochet May Arts lace instead. and different flowers, and vintage and MM buttons. One thing I did do even though the card bases are A2 is I put these all into A6 envelopes to accommodate those flowers. These were done for people who had flowers to me while I was in the hospital.

This Jar's pin can be seen here and you can find this challenge here at SCS to play along with us. Thanks for stopping by.

8.14.2019

WOYWW #532 {a time lapse}

Happy desk peeking day, if you'd like to see more spaces or play along 
the link up for this blog hop starts here at our hostess
There is also a new Instagram hashtag of #WOYWW

 Long time no see ya, at this time last week I was in the local hospital's ICU awaiting the second half a procedure that allowed me to go home that afternoon. I ah have an unprovoked blood clot behind my left knee and it started breaking up and all decided to gather the pieces in my lungs. But, the what they did to me worked and I am doing better and better each day.

 somewhere mid July ish, the Hero Arts monthly hero kit arrived. (along with a couple of add ons of course) I did use the camper for the last IC I had made a sample for about 3 weeks ago now you can see that here.

 and somewhere after that I had a couple different orders arrive all at the same time and did one big mug shot of it all, bought quite a bit of this to use during dtgd but I did not get as much done as I normally do.

and yes, you guessed it another order arrived while I was in the hospital so. yeah. I am mostly working on getting better and better each day to have the oomph to play with it all. if your curious how one of the foil things was used that can be seen in the post before this one. ( all the cards have links to the challenge under them which means I cross linked them from those challenge chatter threads to my uploads in the gallery at scs. ) I have not really had the energy yet to re type it all for the blog but, if you see something you are really curious about shoot me an email.


So that brings me to this morning, on Sunday afternoon I found the oomph to go upstairs and I made some thank-you cards which will go live friday for the IC and one more dtgd card because, I had these new things and I knew what I wanted to do. so, it was kind of a relief that the creative thing did not go kaput when the lungs did haha. :) I have not been able to play since then but, I now need a bridal shower card before Friday since the party is Saturday. and I need to steal the time to finish the card. ( I colored the bride a while back its a curvy one from Stamping bella but, now I am second guessing it because, the brides colors for her wedding are grey and yellow and I think I colored the flowers on this bride in reds and purples or something I do not exactly remember. but, I have also decided to just finish what I started and do her wedding card later in her colors. (the over thinking thing wears me out this week in a normal week I take it in stride)

And if your here for your Izzy fix, yes she really has grown that much at just a little over 4 months old now. Grace is not actually winking, I think right before I shot this Izzy was chewing on her ear and she was still in the flinching go away Izzy mode... She actually puts up with quite a lot of that thing and it is usually after dinner at night before she will put her foot down to being chewed on.
That's about it from me, thanks for stopping by.

8.12.2019

Dare to get Dirty 2019

Did you know that for the 15th anniversary of the Dirty Dozen the challenges are open to everyone who wants to play along not just fan club members? Of course most people enjoy their fan club memberships and the perks are well worth the fee. If you'd like to know more about joining the fan club you can find that info here.
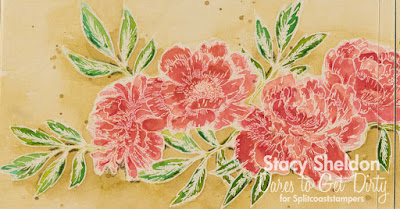

 This was done for Lydia's first challenge seen here. 

 This was done for Lori's challenge seen here.

 This was done for Sandee's first challenge seen here.

 This was done for Angie's challenge found here.

 A closer look at the stickles on the butterflies wings.


This was done for my own challenge seen here.


A closer look at the coloring done with pencils.

 This was done for Ann's challenge seen here.

 A closer look.

This was done for Bev's challenge seen here.

 This was done for Joanne's challenge seen here.

 Done for Julie's challenge seen here

 A closer look at the coloring.

 This was done for Lee Ann's challenge seen here.

 This was done for Kia's second challenge seen here.


This was done for Mary's challenge seen here.


This was done for Polly's challenge seen here.

 This was done for Nancy's challenge seen here.

 A closer look at the center.


This was done for Sandee's second challenge seen here.
 
  A closer look at the center.

 These were done for Shannon's challenge seen here.

 This was done for Andrea's challenge seen here.

 A closer look
This was done for Kelli's second challenge which was to use something you made this week that did not make it onto a previous project, so that green background behind the reindeer is a scrap of the background from the card I made from Lee Ann's challenge.