Showing posts with label Gift Card Holders. Show all posts

12.13.2025

Inspired by {Society Social}

 This week Kia is sharing the Society Social site and Pinterest boards where I came across these Gingham chair covers with bows pin fairly quickly and stopped looking. I tend to do better if I just pick the first thing that catches my eye and I assumed I have tons of gingham... ( I do, but most of it is in shades of red haha) Another thing I have noticed about my self this last year since I gave up my evernote account is, I am not remembering say set names or color patterns. So, I decided to try something new and corral all the things into this tray ( this is the large tray at Simon Says Stamp) I have two that size and one of the Medium.


 My thought was maybe if I did not put everything away right after I used it I would be able to carry the tray to the table the laptop is on and "remember" more of what was used.


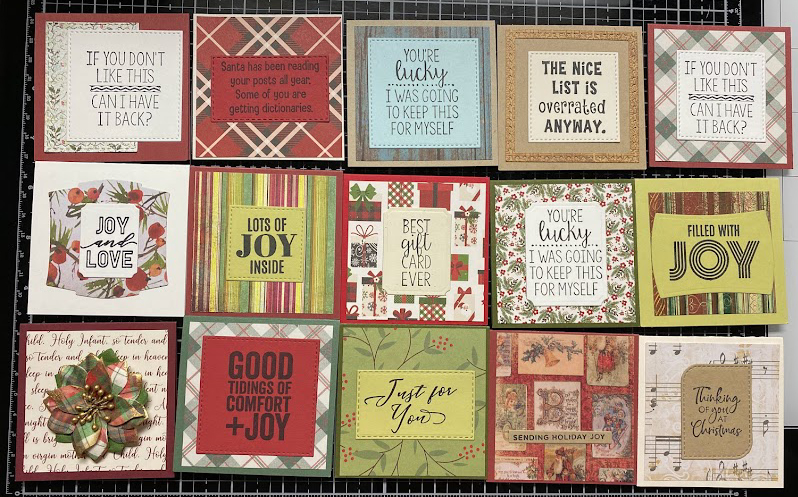
 When I was poking through my loose papers in the green bin I found exactly 1 sheet of some 6" green gingham that could work scale wise for these Simon Says Stamp holly & berries tag dies. So I used it and some other green scraps to create 5 of these tag diecuts with the patterns rotating around and all the edges were inked with some DOX forest moss. These are lined on the back side with that bright green on the bottom of the pile of scraps so they are only on the card fronts with two tiny foam dots incase someone wants to peel it off and use it like a tag. 


 The sentiment's here are from the SSS/TimHoltz Stamptember 2023 set and the cardbases are some Simon Says Stamp schoolhouse red. ( it did not photograph well in this picture) its really a gorgeous color in person and heavy weight. I tied some natural colored May Arts hemp string through the holes and added dots of Red Stickles glitter glue to the berries on these. They are A2 in real life. And were used to hold Gift cards for "turkey" at work on Friday. That's about it from me so far, I am finally getting over the sinus thing I unpacked after returning home from Thanksgiving so, it's now all hands on deck to get Christmas finished up here. If you'd like to play along with us you can find this challenge here at SCS. Thanks for stopping by. 

8.29.2025

Inspired by {Botanical Arts Co.}

 It's my turn to host the Inspiration Challenge this week and I have chosen the Botanical Arts Co. and their Pinterest boards can be seen here. I love looking at this, I think everything I looked at was Watercolored and I considered painting something but, I recently got this Stampin' Up! Totes & Notes set of stamps and dies in the mail and I wanted to see how big this would be assembled and such. ( I think this will be large enough for a gift card to rest in the tote with some peeking out the top. So, I poked around in my printed papers in the drawers and stopped on this shimmery rose print that I had two sheets of and decided to use it. And then chose a rose from the site. Which is kind of backwards from the way I normally pick something but, I just decided to roll with it and tried not to over think it to the death. 


 So, I used some textured green Bazzill cardstock for the trim on the bag and then used some DCWV pink shimmer for the handles. The sentiment here is an Letterpress one from Spellbinders done with Black ink on the white cotton paper from the A little message set. I did cut the tiny tag from the totes die set and then used a couple of shades of mulberry flowers and glue dots to decorate it, the sparkly gem is from Queen & co. twinkling clear goosebumps. I tied it on with some Natural colored hemp string. and then the tissue paper is just something from the gift wrap container in my closet. I think this is just so cute so, I am sure you will be seeing more of these from me. If you'd like to play along with us you can find this challenge here at SCS. Thanks for stopping by. 


7.13.2025

Create Together Slotted Tag Collage

 The second project in the class is a slotted size 8 shipping tag that ends up with slots to tuck the collage inside and so its interactive ( and can hold a gift card) so, later when I end up out and about I will pick one up. 


 This is Iced Spruce distress ink on the diecut tag that I received in the kit I decided it did not have enough water drops on it when I was looking at it and I did hit it again.

Like so, I could see the "Wintery snow effect" in the ink better on this one.


You can see on the Santa's hat one of the Mica flakes is a little big, ( that one eventually fell off as I was putting him in and out of the tag later) 


 I am not really a dried glitter person so, it surprised me how much I like the sparkle of this Snowflake mix in the kit. ( I have also been trying really hard to keep my fingers out of my eyes because, I have 2 fans going up here and the little portable AC tucked in the corner so, I think some of its gone airborne ) 


 I had to laugh when I looked closely at my Santa after I got it on because, at one point in the class Tim Mentions that you have to look at the Mica flakes in case you end up with a pirate patch over an eyeball and I really did. the second largest flake on the brim I wiggled that while it was wet to turn it more over the glitter and not over his eye. This view gives you that scale of how big the mica is compared to the glittery mix parts. 


 These are the pieces I thought I might tuck into my slots, I did end up editing this down as I filled it up pretty quickly.


 So this is where I ended up. I need a gift card to tuck the pointing hand to and so its just ready for that later. I also ended up trimming away some of the background color between the Petals and stems of the Poinsettia sprig so that I could tuck the little piece of "seals" layer between it. I did glue that little circle red Dec 25th to the front of the little snapshot piece, so she does not tuck all the way into her slot because of that bump. Well, I didn't force it anyways just in case the glue is not all the way set. I do think liquid glue has a learning curve but, I am finding its not as steep as I thought it would be. 


 I did decide that after the sparkle paper was layered to the good tidings sticker that I needed one more sparkly spot in the tag so, the flowers received some glossy accents with the snowflake mix as well. This was just shot wet on the table with the cell phone. I am trying to decide if I should put something to the left of the clipped on Believe flash card and so, while it dries I am going to let that thought percolate. That's about where I am at the moment at 1 hour and 43 minutes into the class. There is a hashtag for these projects and its #SSSHolidayCollage if you are playing along. Thanks for stopping by. 

11.17.2024

Thanksgiving Gift Card Holders

 These were built around this printed papers I found in my stash, I knew that I needed something on the A2 size as the place we buy Turkey Thanksgiving gift cards from sells them on post card type paper now rather than just the card. So, I cut up the plaid and word prints, found this orange cardstock and pushed them around on the table for a week or so. and I kept thinking maybe pumpkins maybe leaves. ( I've done leaves a lot over the years) so, I found this Pretty Pink Posh elegant Pumpkins die in the stash and It had not been played with before so, to keep some of the white I decided to cut it from some Artist loft (cheap) watercolor paper. 


And the very first one did not instantly fall apart when I removed it from the die so I decided to tape up the backside of it and keep it as an embedded die, cut a couple more and did the same thing with a few rounds of Daniel Smith watercolors over the top. 

I had some thoughts about leaving no words on the front. ( the inside has the waffle flower Happy Thanksgiving from their set that looks like Farm House font words) mind went blank. but, one of the card front layers I decided it was crooked, lifted it up (so of course the plaid paper ripped) at this point you know all three cards were nearly done so, out came the tin of previously diecut tiny tags and I found this Just for you ( it has to be SU but, who knows what set off hand) and layered those in the same general area where I had the one card rip. I am currently overthinking that idea but, I am also running out of time to come up with some other idea so, I think these are going to stand as is. 

I am really liking this die like this on watercolor paper all taped together and I think I just may do a few more of these while I have everything out. That's about it from me, hope you are doing well. Thanks for stopping by.


11.17.2021

WOYWW # 650 {painting & tags}


Happy desk peeking day, if you'd like to see more spaces or play along 
the link up for this blog hop starts here at our hostess
There is also a new Instagram hashtag of #WOYWW
 

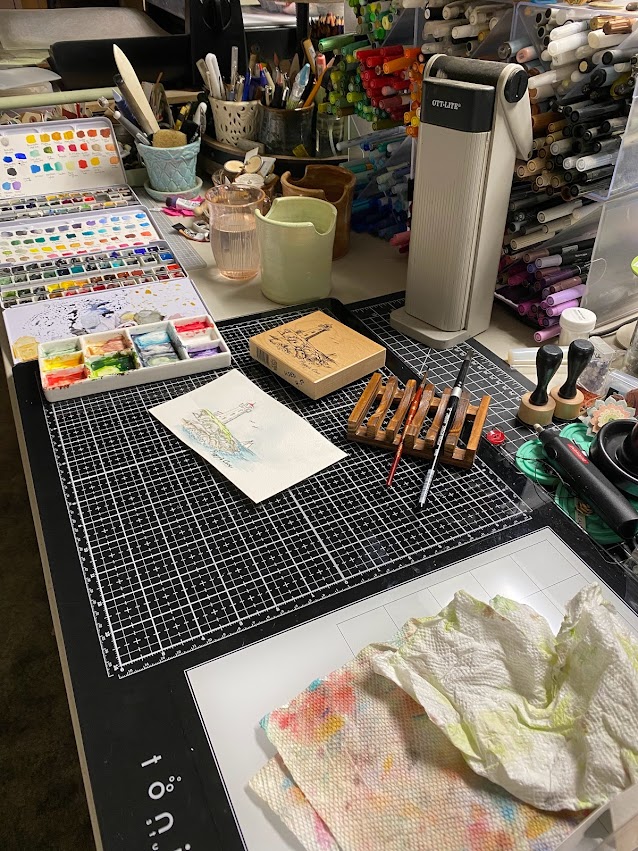
 What my desk looked like before I went to bed last night. The newest addition to my painting "tools" the wood thing is actually a soap dish to hold paintbrushes on, I have been putting them on the paper towel but, sometimes they roll and then I get a flat spot so, this keeps the bristles off the table.

what the coffee table across the room looked like last night.

Simon Says Stamp holly tag dies from scraps with clear stickles glitter glue on them. the tiny tags are the smallest size in the poppy mainstreet pinpoint tags set.

Spent some time peeling cardboard last weekend from a package that came in the mail and did a few primitive tags ( Sizzix die) the cardboard ones I traced around the hole in a drop piece cut from the kraft cardstock and cut those out with scissors to not smoosh the ribs. 

various scraps and dies and I will edit later if there is something you have a question about.


These were done to tuck gift cards in for Thanksgiving for people at work this year. ( Sizzix card, tag die) the embossing is an anna griffin slimline and the acorn is an PSX cut with scissors the sentiment is from Unity Stamps.


while that die was out cut a few more from scraps. 

Lee has a fallidays challenge to do gift card holders... the pine embossing folder is a slimline sized one from Altenew and the Poinsettia one is from Nellies Choice. I left off sentiments on these.


The bits and pieces for these snowmen were already cut and embossed so, really all I had to do was glue and add the sparkle. the size 8 shipping tags were run through the big shot in an Anna Griffin snowfall folder. and inked over the top with salvaged patina.


these are little 3" x 3" done using scraps and stickers and what ever was laying around. 

The plan was to do a few more with last minute stamps that arrived in the mail. so, we shall see if it happens tonight. I have to finish that painting at the top of the pile first as we set up the booth tomorrow night after work and I will be there Friday and Saturday at the school. if you hit the home button it will show you previous posts with more photos of tags and Christmas cards and such if you are curious. I may not make it around anywhere this week either. Stay safe out there and thanks for stopping by.


11.11.2020

WOYWW # 597 {gift sacks}


Happy desk peeking day, if you'd like to see more spaces or play along 
the link up for this blog hop starts here at our hostess
There is also a new Instagram hashtag of #WOYWW
 
So, there is a coffee lovers fall/winter blog hop going on now, and there is also Fallidays challenges happening at SCS. some of my previous entries are in the posts before this one.  I always need a pile of gift card holders for work turkey cards. ( they are really gift cards to a one stop shopping place that even has a gas station) because, in the past employees were sent home with a turkey at Thanksgiving and at Christmas and one year we received a turkey that was bigger than our oven. Yeah, for a long time now we have just gone the gift card route. I had seen there there was a make a gift card holder as one of the Fallidays challenges and I started doing these last weekend from a die that I had not played with previously ( I don't think)  but, I had no time to mess with them on Monday so this is a Tuesday when I got home shot and yes, I deliberately left it looking like this since then just to have something with more texture than my glass mat to shoot for you all ha ha. The washi tape is a recent birthday gift from Cortnie that I had opened yesterday as the shop trucks are rotating through tire places and the dealerships for tires to be swapped out for winter studded ones and oil changes and I took some scraps and skinny dies to work Monday with the intentions of cutting some in the slow times but, forgot to haul down some washi tape so, a roll of that went to work yesterday ( and no, I did not have time to cut any) but, today is one of the days I will be there without my truck so as a captive audience I just may cut some bitty memory box to-go coffee cups. I have an idea for them to use as ornaments on a tree and I really don't know if it will work but, that's one of the ideas floating around in my brain while I was wishing I was at home from work. It is Veteran's day in the US today and I have an idea of what I want to do when I get home again so, hopefully I can get this mess moved out of the way first.  And the most exciting news is I signed the contract for the fiber line install yesterday so, hopefully I will have a count down to install it date soon. That's about it from me, stay safe out there and thanks for stopping by.
 

8.30.2020

Dare to get Dirty {the Pandemic Addition}


This first card was done for Lydia's first Dare to get dirty challenge. The holly pieces are a tim holtz Sizzix die, the background behind them was done with oxide inks and the sentiment is from the Simon Says Stamp fa la la set.

This was done for Dina's challenge the bingo jean and b four sentiment are from Art Impressions the happy birthday is from Stampin Up.

This was done for Lori's challenge. the mug is a picket fence studio die, the background is a Simon Says Stamp Pretty Peonies background and the one in the front is from their Stamptember beautiful flowers 2 set. the sentiment is from Impression Obsession.

This was water colored some time ago the Simon Says Stamp pinecone background and I used it for Angie's challenge with the Impression Obsession sentiment.

This was done for Kitties challenge. the background was spray painted with Krylon webbing spray. the sentiment die is from Echo Park. this one is a slimline size in real life.

This was done for Ann's challenge. The dies are from Memory box & Hero Arts, the sentiment is from Mama Elephant's Holiday Messages set.

This was done for Jeanne's first challenge those birds are from the Simon says stamp fingerprint doodles set and the sentiment is from their tiny words birthday set.

This was done for Lori's challenge. the unicorn & sentiment are from Clearly Besotted.
This was done for Julie's challenge using one of the bitty Hero Arts images I colored on the airplane last year at Christmas. this one is really 3"x3" in real life.

This was done as a combination of Polly's challenge and this week's inspiration challenge that Kia hosted. ( and they did not go live on the same days so, I did not post it until both were live) the Embossing folder is from Memory Box.

This was done for Kelly's challenge using a trinity stamps gal and a Hero Arts sentiment.

This was done for Carla's challenge, the sentiment is from Club Scrap and the background is one that I believe that embossing folder is one of my mil's Anna Griffin ones. ( its not in my basket at any rate so, I am not sure where I got it from) (besides the file cabinet ha ha)

This was done for Judy's challenge and I used the design inspired by this week's featured stampers card seen here for placement jump starts. making a few changes of course, the stencil in the background is from My Favorite Things and the birds are from Art Impressions.

This was done for Bev's challenge the elephant is from Katzlekraft and the sentiment is from Dylusions.

This was done for Sandee's challenge. The dies are all from Memory Box and the sentiment is from Paper Artsy sara naumanns set #39.

A closer look at the treeline, hopefully you can see the stickles glitter glue in this shot.

This was done for Lyn's challenge. I had originally thought to do shapes that would look like cat food but, I really didn't have any stamps that looked like that so, I decided to go for a modified cereal look instead. Riley & Co. sentiment.

This was done for Marg's challenge, the top layer on his hat is dyed cork paper. so, it has fun textures in real life. (SSS gnome die)

This was done for Vicki's challenge, the sentiment is from Our Daily Bread Designs.

This was done just messing around for my own challenge of which I ended up with a pile of backgrounds and I chose the most unlikely one of the batch to do the sample with. the pine bough is a SU folder and the sentiment is from Simon Says Stamp.


This was done for Nancy's dare to get dirty challenge. Its been a long time since I have stitched anything and so, I evidently need more practice again haha.  The tag die is from Papertrey ink and the snowflake is part of the plush line from Memory box.

This shows the gift card a little out of the pocket to give you the idea. 


This was done for Kim's challenge. the doctors bag is from Impression obsession and both sentiments are from the Simon says stamp tiny words encouragement set. 

So, after one week ( well really a little longer as I had the master list of challenges in advance like all the host's do) I have about half of the challenges done and posted. with a few more bits and pieces that need finished on the table. All of the challenges can be found here inside this special forums set aside for Fan Club members. (you can see any of the images in the gallery but, you need to be a member to read the challenges)