Showing posts with label encouragement. Show all posts

1.17.2026

Inspired by {Quilted Chicken}

 This week Denise is sharing the Quilted Chicken site for Inspiration and I came across this snowman pillow that I loved the textures on. But, I kept looking I tend to find two things so that I have time to let them sit in the back of my mind before I pick one ( usually at the last minute) to create. And so, I laughingly decided that this button card with the buttons arranged as a wreath ( which is very very cool) all the button cards I have the buttons are in grid formations) I decided this would make such a beautiful card.


 I die cut a bunch of paper buttons with various dies and wove strings and cords through the holes and none of them looked right on floral printed papers. I spent hours on this ha ha. and finally started over again this morning when we got home. and I did what you see below.

The base is some kraft paper bag colored card cut to A2 with this sheet of I am not sure who makes this printed paper anymore that has subtle leafy prints to it. I found this sentiment in a new to me Unity Stamp set called Gretchen Girl and stamped that on some Neenah cardstock and cut that out with a Tim Holtz label die and just added a couple of the diecut paper buttons along with one tiny real button. And it does not look much like the IC shot I seen but, that's why they call it an Inspired by challenge. That's about it from me, I hope you are doing well & thanks for stopping by. If you'd like to play along with us you can find this challenge here at SCS
 

8.12.2025

A Sunny Day Hug

 This week Linda is hosting the color combo challenge at SCS and she has a desert option of sunflowers...  I knew I had the Cajun craze color so I used that for the card base and just made it up as I went a long for the other two colors that I am pretty sure I have never seen before. 


 So, I cut a piece of Arches cold press watercolor paper and started doodling some sunflower shaped daisy type colors loosely on it, splattered it. drug an dry nib through the leaves for veins. and I really did not like it that much the most interesting part of it to me was the center of the large flower.

So my next thought was to add a side view flower to the left to try to fill in the white space and have something there to cut the large flower out of the center maybe.


So I used every die in this blanket stitched set from Pinkfresh studios to take out some of the whole blooper looking parts of the flowers. I just might use that drop piece frame for something later. 

The base here is Cajun craze and I did cut it to A2 and then I mounted the outside frame crooked. ( it was warped) so, when I trimmed off the odd side it did get a little smaller. I fished out that sentiment ( lili of the valley) from the tray on the table and added some Vintage Photo DOX to the edges of it and an yellow brad to the top and added it with some glue dots to the corner. The center panel of blooms are up on foam tape for a little interest and all in all I think this is OK. :) If you'd like to play along this challenge can be found here at SCS, thanks for stopping by. 
 

5.23.2025

Inspired by {Cotton & Crete}

 It's my turn to host the inspiration challenge at Splitcoaststampers and I have chosen this site called Cotton & Crete. Then also have pinterest boards you can see here. I had saved quite a few things and kept coming back to this wrapping paper seen here. I knew I could stamp something or paint something very similar but, I decided to dig out some really old pads of printed paper and went with these. 


 I did start with that floral printed paper and its from an Authentique pad called Irresitable and its from 2013. The stripe along the bottom is from an My Minds Eye pad called Gingham Farm that is newer from 2019. The lace tied along the seam of them is vintage and the sentiment is from an Ellen Hutson set called "Besties" this was stamped with some versafine on some Neenah solar white and cut with an Spellbinders labels 18 die ( as were its layers) those layers of flowers were from the white canning jar but, I am pretty sure the sheer one on the bottom layer is from Making Memories, the center one is probably Prima and the top one with the pearl is from Hobby Lobby. This is A6 in real life. I know its more frilly than the sample paper and I find that I am OK with that. I think this will still mail as a one stamp card rather than a parcel rate card I am hoping. That's about it from me, If you'd like to play along with us this holiday weekend you can find this challenge here at SCS. Thanks for stopping by.


5.03.2025

VSN {Weather}

 This morning Misti starts us off with an show her the weather on your project. and the wind blows here, almost every day. not quite the same as what you'd see in New Mexico with the whole dust storms but, still big gusts of wind and a breezy thing that picks up in the afternoons. So, I had a few stamps of gals with their hair blowing in the wind and chose this one called "Windy Day" by Katzelcraft and Stamped her with some Versafine Clair Morning mist ink on Arches hot press (smooth) watercolor paper.


 I added in the Simon Says Stamp sentiment after the watercolor paints had dried. The base here is some SU soft seafoam cut to 5 1/2" square. the coat here was painted with one of the sparkly paints so it shimmers slightly in real life. That's about it for this one, if you'd like to play along with us you can find this challenge here. Thanks for stopping by.


3.07.2025

Painting Bunnies

 I had it in the back of my mind to maybe watercolor some bunny images, thinking maybe I would use them for Easter ( or not) but, I used to have a stash of colored images and I really have not added to that in a long time so, either way it was something to do that didn't require thought like when you are trying to fit the perimeters of a challenge prompt. 


I'm pretty sure I have never colored these guys but the chick magnet is from Whipper Snapper designs and that row of bunnies in pots is from Penny Black. so, I stamped them with some Versafine Morning mist on some Studio Loft watercolor paper and started adding some Daniel smith paints to them.


 Another layer, the colors are being inspired by the index sticker art. so that makes it kind of mindless to do. although I am going to have to add some detailing to the little snail on the rim of the center pot, it didn't quite stamp all the way on the texture. 

Then I decided to give the sky a slight blue wash and these are propped up on the edge of the palette to let the water/color flow up into the sky rather then pool along the edges of the images. 


And then I got side tracked because, I seen the Clean and Simple challenge was to do Squares on monday and I like to do square cards but, I decided that the bunnies under construction were too big and too busy to be CAS cards so, I knew I wanted to do some kind of embossed texture square frame so I started by cutting a piece of studio loft watercolor paper with the scalloped edge die in the Waffle Flower lots of squares die set and then I cut that smaller scalloped die out of the center of that piece, and then I used the Stiched circle detailing die in the center of that. ( all these pieces are taped together again on the back side with scotch tape) and the outside frame was run through the big shot in an Stampin' Up! quilt top folder. So, that tiny drop piece in the center I stamped a tiny PSX bunny on that with the morning mist ink and added just a bit of greys to him. The sentiment here is from Lili of the Valley's hex tags set and the tiny brad came from Recollections ( years and years ago) This is 5 1/2" square in real life. And that's about it from me, thanks for stopping by.


3.29.2024

Inspired by {Mackenzie Myric Studio}

 This week's inspiration destination was suggested by Angela Bode Ohmypaper! and I spent quite a bit of time admiring the line drawing art seen on the web site and I ended up eventually settling on this pin of a cute frog snapshot. I liked how the frog was tucked up inside and the colors. It gave me a nudge to dig out this old Stampassions Dianna Marcum stamp called Don't worry be hoppy. and when I first stamped it I did consider leaving it as line art as a nod but, I wanted to color it so, I ended up stamping it on some Arches Cold press watercolor paper and painting it with Daniel Smith paints. When the paints were dry I did add some white gel pen to the eyes and a bit of Nuvo crystal glaze to the pupils of the eyes and the dots and head of the lady bug. 

The mat under that is some old I think Basic grey print that was cut with an Impression Obsession crazy stitched set rectangle and the gingham is unknown. The green sheer I think is Old Olive and the base is some textured generic Bazzill ( The thin new stuff) This is 6" square in real life. I thought about tying on some secondary sentiment to the ribbon but, so far have resisted the urge. I had the idea that doing the sheer camouflaged some of the business of the pot pattern. These colors are once again a little off. I guess I am going to have to figure out what setting I messed with on my camera to get them back to closer to what they should be. That's about it from me, If you'd like to play along with us you can find this challenge here at SCS. Thanks for stopping by.


11.08.2023

Watercoloring Loose flowers

 This week Angie has shared this video  on YouTube called no fail watercolor by Cailey. What I found interesting with her process is she does water first where the paint would presumably flow but, with small brushes. So, that is what my brain latched onto.

So I grabbed a scrap and gave it a whirl, and I was not real happy with the stems so, I grabbed a second scrap and tried it again.


And I did use a very tiny brush so, I could not see the water when it was on the paper before the paint hit. I had the general idea but, it was like painting blind. And then I decided there was not enough color flowing going on because of that so, when it dried I did daub in a little more color over the top.


I used a Tim Holtz sticker for the sentiment and mounted it to a premade Pool Base, So this one is A2 in real life. If you'd like to play along with us you can find this challenge here at Splitcoaststampers. Thanks for stopping by.


7.22.2023

Inspired by and Dare to get Dirty starts

 This week the Inspiration is taking a look at Natures Jewelry (the challenge is here

Where I found this simple cuff bracelet and I knew I had this same thought in a stamp so, I had also received my recent IO order from when their dies were on sale ( I don't remember how long the sale is/was on for) but, I did pick up a little stack of the stitched edge ones including the Crazy Stitched set so, that was how this simple card came about. 

This is A2 in real life, the base is some Neenah millstone, the printed paper was a scrap and the sentiment was white. That crochet lace is from May Arts ( and it's old) the edges of everything has a bit of Distress Oxide Vintage photo ( what else is there right?) 

And today also begins the marathon otherwise known as Dare to get Dirty... I believe altogether there are just under 50 challenges and on today's line up I did play along in advance making a Christmas tag for Lori's first challenge seen here.


I am going through this phase of use some of the older things you have and neglected things you have to you know make things you will really use type of a mind set. This old stamp is from Penny Black called Santa Wishes and I had stamped it with some Simon Says Stamp barely beige ink and colored it with Copic markers. this had that no line coloring look but, I wanted it to be a little sharper where the stitch lines should be so, I ended up grabbing a fine line marker and adding them in after the fact.

Like so, and also grabbed a white gel pen for cheeks and highlights. I cut this panel out with a die from the Our Daily Bread Designs lavish layers set. ( I like that little peek a boo cut away along the edges) rubbed some (vintage photo DOX) on it.


For me the fun part of making tags is you can make them lumpy and heavy and collage-y as you want because, I never stick these in an envelope. they either get gifted out in person or packed on packages in boxes so, that is just a little fun thing for me. The printed reverse sentiment on the bottom is from Simon Says Stamp it's up on foam pop dots, that little metal prim star is really old from Making Memories, The foliage is a die from Penny Black ( cut two of them) from watercolor paper and painted with Daniel smith paints.) called Berry Branch. I think that plaid printed paper is Basic Grey cut with a spellbinders Shortie tag, there is cardstock glued to the back side. ( I have every scrap of that stuff squirreled away still. ( I use it but, I cut it even the tiny pieces) the stitched ribbon is from Stampin' Up! and the grossgrain is unknown, the tiny tags are from the Poppy Stamps mainstreet pinpoint tag set, and the larger one is from I have to look that up. The tiny tag has a SU itty bitty sentiment on it tied on with some Black Hemp string. 

I make it into a hobby lobby store about 3 times a year and right before I made this tag I had seen that they are still selling Stampabilities wood mounted stamps ( that surprised me) and I liked the font/size of this one so, that is what is stamped on the back side of the tag.  So far, from today's line up this is what I have done. If you'd like to check out the DTGD challenges your fan club membership needs to be active and you can find them all here. That's about it from me, hope your doing well & thanks for stopping by.


4.18.2023

Watercoloring simple landscapes

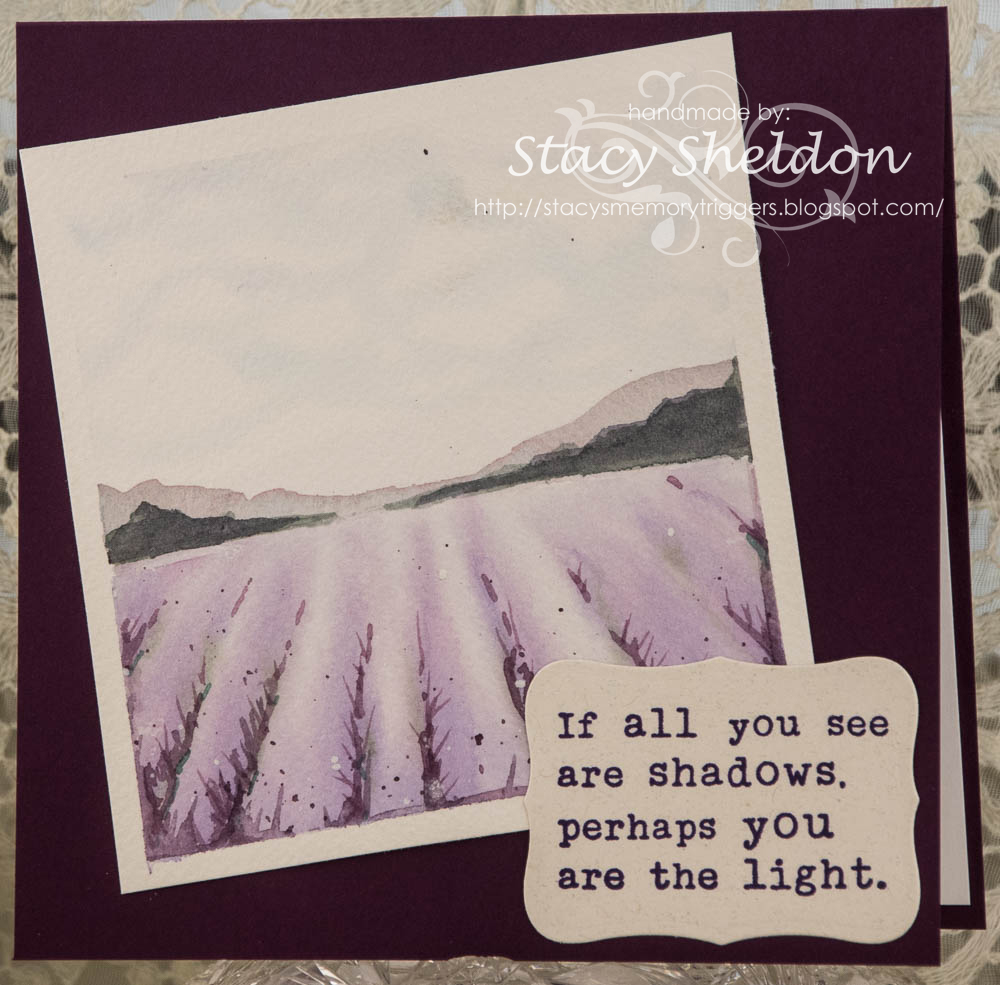
 This week it's my turn to host the Watercoloring on Wednesday challenge at Splitcoaststampers and I have chosen this duo of simple landscapes from MarenaArt as I loved the lavender field one.


what I loved most particularly about this video is how she did her sky in them. ( first round of paints wet)

second round of paints, and at least the sky shows up better dried I had worried I did it way too diluted to get any texture while it was wet.


I really thought oh, there is not enough paint on it during the second shot as I glanced at the phone so, I did immediately put on another layer and first round of splatters.

and some white bleed proof white splatters and then I thought oh, the front hills should have more green to them so, that received another swipe of paint also.


I did manage to get some of the splatters in the sky oops. 


But, I also really liked how it turned out even with flower splatters in the sky so, I trimmed it down and mounted it to some SU blackberry bliss. The sentiment here is from Impression Obsession stamped with monarch versafine and die cut with a labels 8 die. This one is 5 1/2" square in real life. That's about it from me, if you'd like to play along with us you can find this challenge here at Splitcoaststampers. Thanks for stopping by.


12.27.2022

watercoloring drybrush grass

 For the final water coloring tutorial challenge of the year Linda has shared this using a dry brush for quick grass backgrounds from Wendy Powell-Jones seen here on YouTube

I had watched the video and then set out to recreate something similar without really doing it in a step by step type thing as I did this stealing time between the holiday events so, I think it turned out ok.


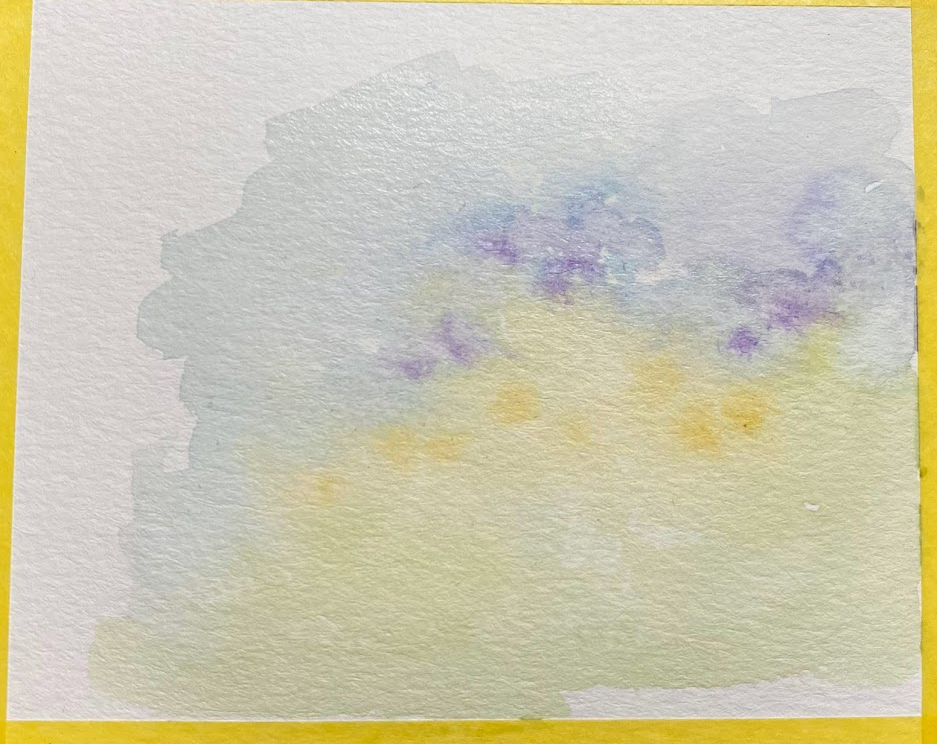
 The first step was to do a soft wash of yellow and purples for the background. I am not a fan of either color but, I gamely did so and let it dry. ( This is on Strathmore 400 series wc paper) 

Funny true story, on the practice strip I got really cool dry grass blades, on this taped off sheet I got some big blobs of paint. 


at this point I decided to start dropping in color blades with a rigger brush and I remembered there was supposed to be flowers in the grass, so I started adding some in over the grass without having masked some blank space before hand. oops. ( also did not sketch a thing either) 

Pulled the tape off added a Riley & Co. sentiment to the corner and then added just a few splatters to the grass and more red blooms. of course some went into the dry sky and I decided they were flying bugs rather than stray splatter. ( that's my story)

When the paint was dry I did run it through the big shot in a Spellbinders rectangle die and used some textured green Bazzill for an A6 base under it. ( this one is flat to the cardfront) 

I probably should have used some foam tape as even though I did tape this to a board, its not perfectly flat it has a twist going on. might stick it under some books for a while. That's about if from me, Hope you are all doing well. Thanks for stopping by. If you'd like to play along with us, you can find this challenge here at Splitcoaststampers.


8.30.2022

Watercoloring a White Flower

 This week Brenda has shared with us a negative type painting to do white blooms with just a touch of paint for texture / depth? on the petals. You can find this tutorial here on YouTube. The name of that video is how to paint a white flower from creationsceecee. 


I remembered the whole use the binder clips from last weeks challenge and since these were still on the table from that and already splattered with paint I decided to grab them again. first round of paint wet.


 Decided to shoot round one dry so you could see how much it fades and that it only warped a little at this point. 

Second layer of background paint ( wet) 


So somewhere between the second layer and this one I erased the pencil lines, added the white bleed proof ink splatters and the gold trim ( which was not very dark) so after I picked it up from the board here ( the only thing holding it down is those binder clips) I pained a second layer of gold paint everywhere you see it. 


I left this panel under a box of metal dies all day trying to press it a little more flat to cut it with a waffle flower rectangle die so that the blackberry cardstock base could peek around it for framing and that was not so successful. So out came the foam tape ( which at least stretches it kinda sorta flat on the card front) I did stamp this sentiment after the card was "done" but, I cannot figure out which set this one came from. ( the rubber is purple and its on cling foam so your guess is as good as mine) I hope you are all doing well. If you'd like to play along with us this challenge can be found here at Splitcoaststampers. Thanks for stopping by.


6.28.2022

Clean And Simple Watercoloring

 This week Angie has shared with us this quick tutorial from Lydia about using the delicate frog tape to do quick little watercolors. And I have some, I bought it years ago from something she shared but, I have no memories of seeing this particular video ( seen here on YouTube )

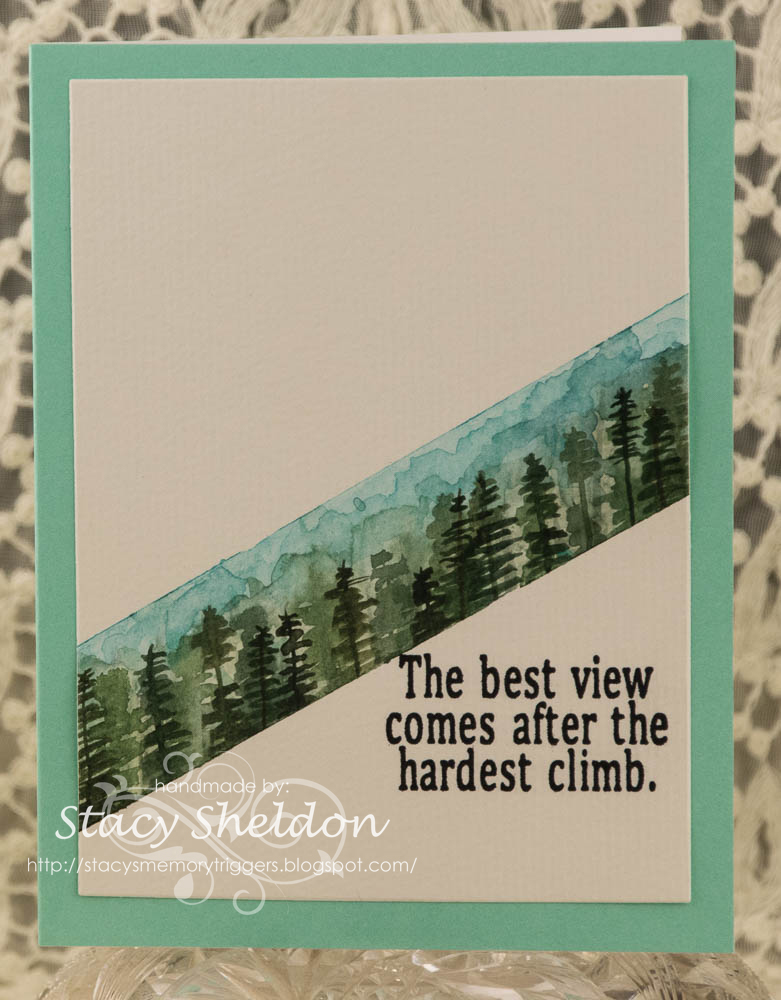
So, as I was looking at the video I had the idea to do something ( not floral) and I knew if I kept the angle for the strip I had this encouragement sentiment stashed and thought it would be pretty easy to make a side of a hill/mountain with tree tops on it. So, I picked up a quarter sized sheet of some Canson 120# textured watercolor paper I have ( as its not flat so as a test to see if there would be "leaks" under the grooves) and the good news is that tape sealed to the grooved paper pretty well as you can see in the next shot. but, I did tear a corner of it. 

As I was removing the tape, So I grabbed the Hero Arts rectangle dies to cut it down smaller. 

It finished out as an A2 card on some "Pool" pre-made cardbase. That sentiment is from the Club Scrap Dahlia Jumbo set that I am sure is not made anymore as its a rubber stamp. That's about if from me, Thanks for stopping by. If you'd like to play along with us you can find this challenge here at SCS.


2.06.2022

A catch up Post

 I played along with a few other challenges in January and never stole time to blog about them so, here are a few. 

This tiny pooh bear is from all night media called Pooh's Heart. The sentiment here is a reverse printed one from Simon Says Stamp, its framed with a piece of Vellum run through an Anna Griffin Layers cut & emboss set. this is up on foam pop dots to give it some wiggle room over the ruffled May Arts ribbon. that printed paper in the background is an old one from Basic Grey.

Pooh was painted with Daniel Smith paints. Did you know the copy right for Winnie the Pooh hit its expiration this week? ( it did) so, there are brand new Pooh stamps so far I have seen at Unity Stamps ( I have ordered some for me) (you can find those here  and here if you are curious.) This card was jump started by this card from Marilyn seen here

This one was done when Ardyth was featured stamper, I had loved this card she did here with the vellum gate fold and then later came across this CAS bird card and it all kind of morphed in my head.

On my version, I used a Mama Elephant mod heart die to cut a window into the card front and then used some textured vellum from K & Co. to cover that. The bird here is from the Tim Holtz Feathered Friends die set cut from some previously dyed watercolor paper that had been dyed ( years ago) with left over Paas Easter Egg dye. ( it takes a while to lose the vinegar fumes so, I still have a stack of this in various colors to play with in the file cabinet) I did rub some salvaged patina oxide over some edges of the die cuts on the bird to help define them. The eye is a tiny recollections pearl and the sentiment is from Impression Obsession. 


Last week Kathy was featured stamper and a few weeks ago the Clean and simple challenge was do to something with "getting healthy" for the new year, and I had this lipstick sentiment out for that and then never got any farther with it. flash forward to last Sunday. Kathy has a lot of Snoopy in her gallery and I came across this one. And decided I could use that as a jump start for the colors of mine. This Snoopy is from Stampabilities called Operation Bowl. The sentiment here is from Inkadinakado. They were both stamped with some Versafine on the Neenah and the color was added with water color paints. that panel was cut with a Pinkfresh studios blanket stitched rectangle die. The red pre made base is a sparkly one. 


The Clean and Simple challenge last week was to put a heart on it. So this D.O.T.S. heart was stamped on some Arches watercolor paper with red versafine and painted with Daniel Smith paints. That panel was cut with a Spellbinders hem stitched rectangle die which decided to come un tapped before it went all the way through the big shot so, luckily the see through parts were still OK and so I cut this down to the very edge of that in a paper trimmer. The pink base here is some pre made Stardream and so, it is also very sparkly in real life. That's about it from me, thanks for stopping by.


8.22.2021

Some more from Dare to Get Dirty.

 There were 49 challenges in total this year for Dare to get Dirty week at SplitcoastStampers. I have not done them all as of yet, the good news is the inspiration stays up on the site for future use. So, here are the rest of the ones I have done so far. I cannot tell you what the challenge is but, I can say what I did or used. This will be a really photoheavy post so, grab your cup and enjoy.


This was done for Lydia's first challenge, this girl Unity Stamps Just Sorry was stamped with versafine on Neenah and watercolored with some Karin Markers ( skin & hair) and Daniel Smith Watercolors on the rest of the image. The sentiment here is also from Unity Stamps the Crappy Day set. ( its up on foam pop dots)

The front panel here I have cut a hole into the top end of it to tuck the girl from behind and used the same acrylic paint on the edges of her panel as the front to make it a little more seamless. I did run that textured panel through the big shot a few times to flatten it a little more. ( its Masking tape with covered with gesso and paint) I thought it looked like a messy bed. And this one finished out at A7 in real life. 


For Dina's first challenge I used this So Many Hearts girl from the precious moments line at Stampendous ( this is a really old one) colored with pencils and copic markers (skin) and the sentiment here is from Hero Arts Many everyday messages set. the door is an Alexandra Renke called wing door. This one is A2 in real life. 

So a week ago the inspiration went to a home design magazine site and I being an alumni dirty girl also had access to the master list of challenge knew what Lori C's first challenge would be so, I combined these two. The home design photo that jump started mine can be seen here. What an awesome back yard hmm? So, I picked up the My Favorite Things perfect pool stencil when it first came out and this is the first time it has been removed from the packaging. so I decided to tape it down to a piece of cheaper canson watercolor paper and "paint" through the exposed holes. It did bleed a little bit, and I did go over the top of some of the bleeds with white Gouache after the stencil was lifted and the Duck was stamped with some Cheerful (yellow) Versafine Claire and watercolored with Daniel Smith paints, I cut a slit into the water panel to tuck his tummy into and taped over this on the back side to help keep him flat. The sentiment here is from The My Favorite Things you float my boat set, and it finished out at A7 in real life.

This was done for Gem's challenge and I used a Spellbinders hemstitched rect. die on the cover of the cardbase and Their shapabilities Joy set for the center. The letters are up on foam pop dots and the pearls are from Kaiserkraft, ( they are a blush color but on the barn red texture they may show up as cream on your monitor) the inside was lined with some Neenah because, I always put white cardstock on the insides of my colored bases to write on. This one is A6 in real life, and the first Christmas card I have done in months and months. which poked my brain into looking at more of the challenges thinking and over thinking to see if they could be modified to become Holiday cards too. 


Which lead me to Lee's challenge, the base stamp here is a background from Simon Says Stamp that was heat embossed with white SU powder on some pink shimmer DCWV. the Vellum layer is an older holly berry house that was also heat embossed on the top side and then I used water base markers in spots of the back and I really thought that gave it a kaleidoscope look. So, I added some dots of glittered stickles glue in a few spots too. this one is 5 1/2" square in real life. 

I found this image Our Daily Bread Designs the mighty sea already colored with some pencils in the envelope on the table and so, I used some previously made watercolor background for the framing and then while I was looking at this, I have had my Daniel Smith watercolors on the table for a few weeks now, I decided to add some paint here and there over the pencils. The sentiments on this are from the Altenew camp life set. and this one finished out at A7 in real life. 

So Kia has a challenge that I decided I would watercolor for it, and this is the center piece of a frame diecut and so the bloom is from the eclectica3 kay carley 47 the pretty flowers were a feast for the eyes set and heat embossed with white powder over the paint. I did go over the center with white Gouache and some stickles glitter glue. That sentiment, I spent hours over several days trying to figure out which set it came out of. I cannot find it in evernote so, I will probably end up poking around in the stamps them selves here and there and edit later. I found it in the file cabinet in one of those pockets of previously stamped and diecut sentiments. the center panel is up on foam tape and this one is 4" x 9" in real life. 


So this is the actual entry into her challenge and its also a slimline card. the homes and sentiment are from the Concord & 9th city stacks set. 

a closer look at the painting from the card below. The road runner is "on the run" the Wil E Coyote is called "Yipes!" the center has some shimmering from Stampscapes ( but, it is a small stamp, so I deliberately used the paints in lines to add more streaks around them.)

The silhouette in the back is from the sweet n sassy landscape silhouettes set and the sentiment is from Impression Obsession pandemic humor. 


The painted panel is on foam tape above the base and this one finished out at 4" x 9" in real life, the edges were cut with deco scissors. 


You might remember this panel, it happened to fit Pat's challenge so, I did some layers of speckled Neenah cardstock to frame it trying to detract from the fact that I had taped the tape across the top crooked when I painted it a while back and that was one of those hunh moments when it was revealed. 

I probably could just mix up some more blue ish paint and touch up the top left corner but, so far I have resisted the urge to do so. This one finished out at A7 in real life. 


 Done for Liz's challenge, the Victoria's Secret is from the Emerson line at American Art Stamps, the bra-less is from Art Impressions. She was colored with Karin markers and Daniel Smith watercolors with some stardust gelly roll pen on the glasses. 


Some where around Wednesday the watercolor prompt came out and it was to do some free hand blooms and I had a mess of yellows on the palette at that point and I knew what the DTGD line up looked like so this ended up being made for 4 different challenges, the Wednesday watercolor, Jen, Holly & Ann's DTGD challenges. the Sentiment here is from the Penny Black A little bird set. 


You may have remembered seeing this dog face ( Impression Obsession) being painted when he arrived in the mail, the sentiment came out around the same time too, so this was done for Bev's challenge. 


This was done for Shelly's challenge. the birdhouse is from the old SU set called scene in a garden. The sentiment here is a reverse printed one from Simon Says Stamp ( some spring set) That red panel is vellum with alcohol inks on it and to allow the light to flow through like a window, the front panel of the card also has a window cut into it from the inside of the base. This one is A2 in real life. 

This was done for Mary's Challenge. The sentiment is from Riley & Co. the Oscar reading the paper is from Art Impressions ( this was stamped twice as the top colored layer is paper pieced into the scene.) the rest of the room are from two different My Favorite Things sets, Cozy Companions and Our Story. the main layer here was all colored with Daniel Smith paints. 


 Now this I did not make, this one came to me the other day in the mail from Shelly with a sample of some gold leafing flakes to play with and the sticky note that said do not open with the fans running. This is one of her samples she made for DTGD and it sparkles so beautifully in real life. Thanks Shelly!


 Which lead me to playing with them for a little something for Judy's challenge. the cat is from Art Impressions, the sentiment is from the Shut up and Color set from Dylusions. this one is A2 in real life. that pale aqua color is an shimmer cardstock from Micheal's recollections line. 


This week the Inspiration destination is looking at Nordic Wall where I found this piece of art 

and my first thought was you could paint that. ( not a normal thought for me) and my second thought was, you could have a two-fer card and use it as a sample for Tracie's challenge. So, I did this is Daniel smith watercolors with a bit of White Gouache. the sentiment here is from the My Favorite Things anything but basic birthday wishes. It's 4" X 9" in real life. 


 Which leaves me with something I had done for Jayne's challenge. the teabag here was paper pieced back into the design using a used dried coffee filter. the other color around it and on the tag are DS watercolors. the sentiments here are from the Verve Stamps one cup set. the embossing folder is one I had borrowed a while back from my MIL and I have forgotten its name, but there is a heart underneath the image panel in my card on it. the lace here is vintage from the notions dept. and this one is A6 in real life. I do have something drying / de-fume - ing for Jayne's second challenge and hopefully sometime soon I will get it done. I hope you enjoyed this, thanks for stopping by.


Decided to just edit this post with the last card, this was done for Jayne's first challenge. the butterfly was painted last April some time, the cardboard was painted along time ago too. the background panel was run through the big shot inside a Cuttlebug goochie script folder and it has some Antique linen and Salvaged Patina DOX over the top of the leaf pattern. and I realized the reason I never used this butterfly is. I did not leave space to give it a body. ha ha. ( did you notice that before I wrote it?) ( I didn't) 

I did actually get a group mug shot of them all before I started mailing some out.