Today one of the challenges that has gone live is Kia's use vellum on a holiday card seen here. and one thing I have loved the look of forever with vellum is to heat emboss with white powder on it. So, I dug out this (it's a well loved vintage stamp) from Outlines and stamped and heat embossed it 4 times real quick on some Papertrey ink vellum cardstock. ( I only ended up using three of them on this card so, I do have one set aside for later to use. a long time ago someone shared "clear" foam pop dots and I bought a pack way back when and finally opened it for this. so, that is what is in the between layers. The sentiment on this is from the Mama Elephant holiday messages set. the lined Bazzill I wanted a piece of it to use as a topper on one of the twin pocket purses I made earlier so, I tried to line up the rectangle ( ODBD) double stitched die into the center of this scrap so that I would have the drop piece as a frame for something else. So, I did switch the base to a different bazzill texture to peek through and behind the snowflake layers.
A closer look at the layered snow. I know you can click on these photos here to have them open larger and then just use your browsers back button to continue reading. That's about it from me this morning, I have little piles going on of the other challenges I want to try over the next little while and will be doing more here and there. thanks for stopping by.
11.15.2019
11.13.2019
Falliday's continued
MariLynn has a challenge to do one of the tutorials of gift card holders with links to some at SplitcoastStampers and I chose this one that makes what is kinda like a matchbook around little coin pocket envelopes that had the flaps cut off. I watched the video seen here.
And I did alter mine that is show in the bottom photo of this post. I did not use the magnets for closure but, instead some ribbons and laces.
a slightly closer look at these, the stamps are from the Papertrey Ink autumn hills set. That printed paper is from crate paper ( its old)
These were done with the same tutorial using things from the stash, the one with the felt tree will be the one people can play with in the booth.
And more of the same.
A peek at the inside there is a piece of score tape that has already had the cover sheet removed so the ribbon would stick to it under that piece of ribbon. then I just added more to bracket that and put the sentiment panels over the top of it all. I think these turned out really cute and they were really easy to make. Thanks for stopping by.
WOYWW #545 {craftlikeacrazychicksession}
Happy desk peeking day, if you'd like to see more spaces or play along
the link up for this blog hop starts here at our hostess
There is also a new Instagram hashtag of #WOYWW
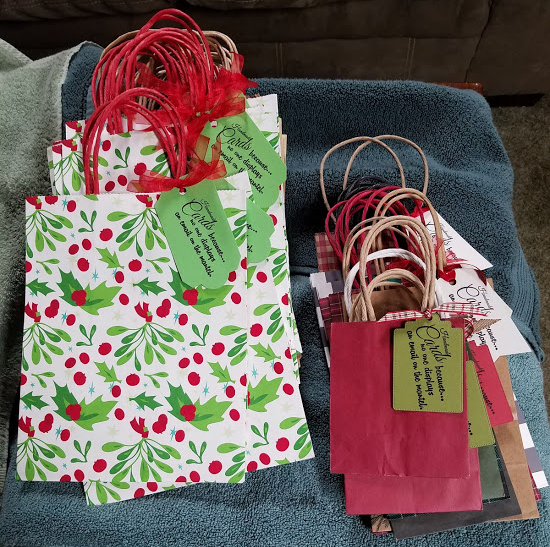
the tags all read Handmade cards because, no one displays an email on the mantel. You'll notice these tags were stamped with versafine and are spread out drying over the containers of tags and gift card holders heading to the booth and those feet peeking out belong to Grace. :)
and these are bags I will put purchases in at the booth next week.
So, this is a 5 minutes ago Wed am shot that is left overs from Mondays bag stamping session.
In that pile behind the open tags envelope is the rest of the order from Riley & co. that came.
( I will shoot this later) They are all silly ones though from the funny bones line.
including the sentiment below paired with the IO McScotty dog.
There is a face it challenge for fallidays ( use a face) and the featured stamper this last Sunday was Lora and she has this fun card here and I had the dog colored and the words came in the mail so it pretty much made it self Saturday night. I am mostly just gluing little 3X3 cards together now as it goes into this last week, there is room for some more hmmm gift card holders or Christmas cards and I may do just a few more of those since I have all the leaves colored and I still have the foiled backgrounds I made with the transfer foil a while back. I did end up caving on a foil press for my birthday and that is very cool that it letter presses the foil into the depression the dies make. (and the foil is not flaking off of those sheets as of yet) :)
More photos will follow soon. That's about it for me, I am driving all day for work today and tomorrow I see the cardiologist again to find out the results of the scans they did looking for the blood clot last week so. hopefully. :) Thanks for stopping by.
ETA so, there are no blood clots left in my leg so, now I am off the blood thinners for a month and in two weeks we will try the genetic markers test again with the blood and then rescan to make sure no new blood clots are forming off the meds and we will find out if I get to stay off or go back onto them. and if it turns out I can be off of them, then we will look at taking out the filter screen next year.
So good news :)
11.08.2019
Inspired by {Ruby Mountain Paint Co.}
This week Angie has pointed us in the direction of the Ruby Mountain Paint Co. online. And I happened to see these earrings ( seen below) and instantly thought, OOh that would be so cool using the tutorial for the diecut napkins shared by Dave earlier in the week for Fallidays.

The kraft colored napkin was given to me by June who happened to go to Arby's for lunch, and I did spread it open and fold it to make 8 layers and backed it with a piece of kraft cardstock and cut that with the Memory Box Circle forest scene die. and then I used my Hero Arts nested circle die to do a plain circle from some PTI aqua mist cardstock to be the base. The sentiment is from the Clearly Besotted Message me set cut with a Simon Says Stamp sentiment strip die, I did run that over the edge of the curve and then just snipped off the excess with scissors. The napkin layers part was painted with Kuretake Gansai Watercolors .
You can find these earrings here in the store. And you can find this challenge here to play along with us, thanks for stopping by.
Birthday Gifts
Handmade Birthday Cards I had received from Stampers.
Some cards I received during/after Dare to get dirty last August.

Stamps from James & Cortnie,
This pincushion Cortnie found while she was away on at a break from a training school. ( the stitched felt is tucked into a vintage jello mold.
So, I caved and bought the foilpress from Crafters Companion because, I already had the Gemini Jr. machine. and a few dies and foils to play with it. More about that will be coming soon, so far so good. the foil does not flake off the projects after like the transfer foils do.
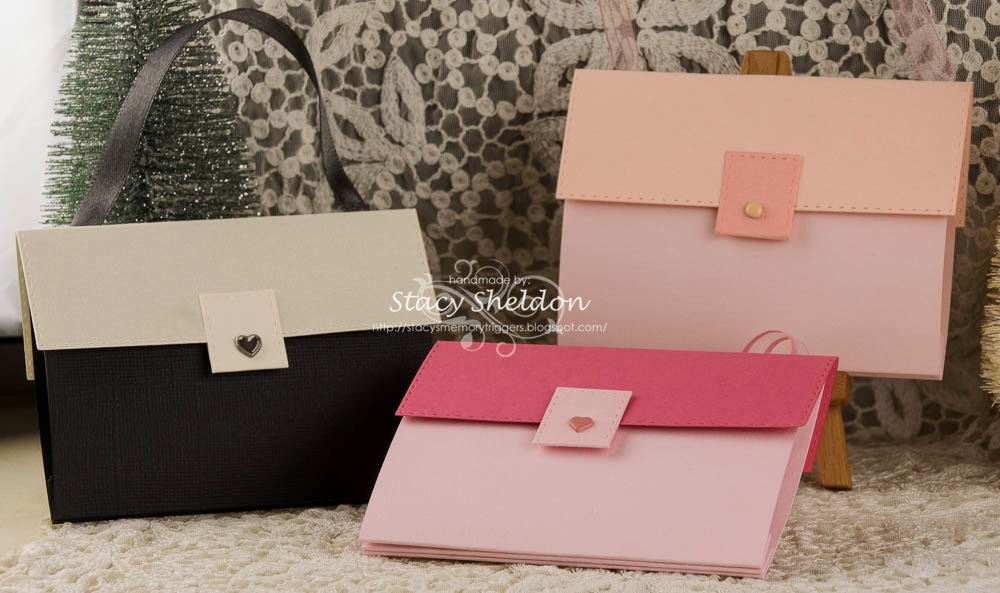
Fallidays Twin Pocket Purses
This was the view of my desk Tuesday after work, I didn't make it up the stairs to do a share your desk post because, I had wanted to do a squeak in the birthday cards to that post and I still have not photographed the cards yet, the no day light after work is always a hard thing to get used to in the fall. What you see here is the first twin pocket purse that was almost done, and I had posted an open shot of it in the previous post on the blog. You can find this tutorial here on Splitcoaststampers.
The clear velcro dots arrived in the mail on Wednesday and so wednesday and thursday 8 more twin pocket purses were done.
And then as I look at them what makes them interesting is the mix of prints on the inside which you cannot see when they are closed so, I believe I will be using that first purse as the "open me" at the booth. I did use brads for the hardware embellishment on the flaps except this one black and white one has a goosebumps sparkle. ( I am worried that its just glue it may pop off?) not that anyone expects these to last forever but, I would want them to be able to be played with a little bit.
There are no words on any of these no even the little note cards tucked into the front pockets. So they really could go any occasion. That's about it for now the booth opens in two weeks so, the craft like a crazy woman continues, thanks for stopping by.
Subscribe to:
Posts (Atom)