11.08.2017

WOYWW #440 {and a floor below}

Happy Desk Peeking day! If you'd like to see more or play along this blog hop
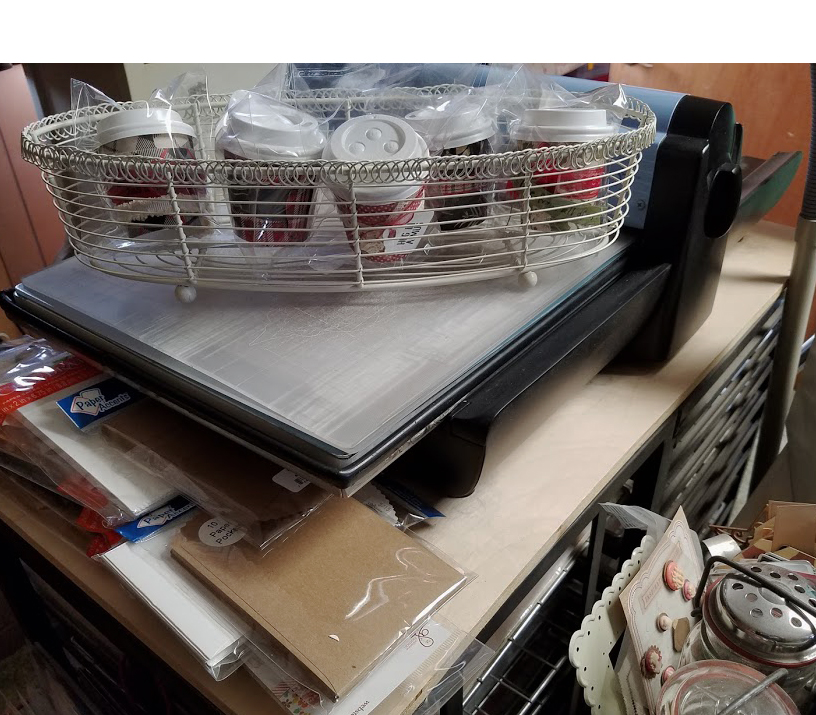
 So craft like a crazy person is under way here. ( these are tuesday afternoon shots) I had the bright idea to order those mini coffee to go cups ( a small package of 50) with the intentions of doing say 12 of them at the booth as a test the waters thing...

 one under construction. there are more mini coffee cup mug shots that will follow this post with one of their own in case that is not your thing. all the stuffs I have done since last wednesday are piled in the other two posts before this one. mostly mugshots no words yet.

off to the left where I was dumping finished cups at the time.

 okay so, for the first time during a November show my booth is moving out of the hallway, and into the Gym. ( its a small private school) anyways, my now floor space is only 6' x 12' foot so, my darling husband hauled all my walls and ladders in from the barn to the back of the garage so, I could "see" how tiny this space is, I will not be able to bring everything I normally take to the school, which on one hand is a good thing. ( I kind of get tired of hauling it and am glad I only do this one 2 day thing) so this was floor plan #1 I had
and this was number two, I also have a bunch of metal things I can hang on those "walls" that get fabric panels in the centers of them, so. this one I think I maybe be able to sqeeze in one of the standing spinner racks but, people would not be able to reach the walls ( most of the shoppers are shorter than me) so, I am going back and forth in my head of which one I like "better" the other thing is this is really tight quarters like this I think people with big shopping bags on their arms will be bumping into each other no matter how I push things around.

so, that is what is going on here. visits will be made during slow times at work because, I am running around like a crazy person when I am home. Thanks for stopping by.

A crazy catch-up post

So, these are still those TH sizzix gift package gift card holders that were started last week, I ended up selling 8 of them to my friend at work so, since I wanted the small basket I had started putting these in to be more full I made a few more. with more or less the same papers.


I really like these and will probably be making more of them for me to personally use too.

I did cut up one entire pad ( minus the 2 patterns I do not like) to do these with. so, I have also picked up more pads of this paper ( Tim Holtz) because, its one of the few pads I felt that way about 20 some odd sheets in the same pad.


Now these came about because, one of the things I do at my booth is remove the price tags from the backs of the purchases and re-use them the next year and I have some price tags for ( empty sacks) I have in the past bought at Costco packs of fancy hot chocolates but, that gets complicated when people are like I wanted the last yada yada caramel what not in the red plaid type situation. ( which I move it for them when that happens) but, really its easy enough to just sell them empty and let people fill them. 

all the sentiments had been previously stamped and die cut so, they are out of the basket on the table. 

These are little sacks from Micheals that were just plain kraft. I am trying to remember the size but, large enough for a gift card or a cocoa packet. 


all of the bags that are missing a wooden clothes pin received one after its mug shot and during packaging later.


Which lead me to having  a pile of skinny printed paper scraps... so, more 3" cards were made real quick

all of these sentiments were previously stamped and die cut so, 


These go pretty quick actually.

these ones are a little larger than 3" maybe 3 1/2" ones.

the one in the center is a little larger. 

these I made a while ago and just found the photo in the to be uploaded folder..


and then there were these tiny little scraps of paper left so, I cut these tags from the Sizzix library pocket die (the tag is part of that) 

they all are double sided so the printed paper is backed with cardstock for strength. 

only about half of them have the jingle bells tied on, some are flat and could be used for book marks later. 

one of those "new" stamps that had never been inked came out to play sometime last month and I did these and set the photo aside because, it was when I was making fallidays posts fairly regularly.


the Penny Black postage was stamped a long time ago so, this was just a using up scraps and images and such type tag. 


Last weekend the inspiration challenge headed to this store called front gate and I glanced at this photo of the outside of the house and the white house with the pops of RED caught my attention and I had a second green shimmery wreath from the concord & 9th die layered over this Penny Black die and somehow along the way I did not end up gluing it on..


So, this is the house :) the garlands and wreaths just make me smile.


this card finished out at 5" x 7" in real life, the lace is vintage. the sentiment is from the Concord & 9th set called Joyful Noel. 


This was an attempt at last weeks sketch challenge ( which is a little bit off) that lady bug is from Whipper Snapper and its name is June Bugg

I am going to edit this and ad words later, but its that time of year again when there are now 7 crafting days left till the Shepherds Market booth opens. so craft like a crazy person is underway here. So poking around in the trays that go to the booth for the display it became evident that the round tags had mostly sold out last year so, I made more of them also.


11.03.2017

Gift Box GiftCard holders


So ( this is number 2) in the line up but, I like it a little more than the very first one (below) and so, this is that newer Tim Holtz Sizzix gift card package die and this version is the pieces (one of each) what is different about this one from the first one is I had used a ribbon slot punch to put two holes into the flat bow diecut to weave the fiber through to tie the tag on. the one below the fiber wraps around the outside edges of that bow.

 So, this was the first one, and in the beginning I had that tag tied around the ribbon that goes up the side of the bottom of the "box" but, that really bugged me so, I ended up moving it higher.

 And then I started ad-libbing other diecut tags to tie onto it.
and then I took these first 4 to work to see what June thought of them and she bought all 4 of them as is and put in a request for 2 more...

 So, I came home and started again, ( these are for the booth in a couple of weeks)

 A lot of these prints are from a Tim Holtz 8" pad of printed papers.
The ribbons are from mostly DCWV shimmery and glittery type pads.

 The fibers used are mostly burlap string from May arts with the ever popular irridescent cord.

 and so this is when I started digging in my scrap papers for other prints.

 Decided to open one up so you can see how they pull apart. Its a two piece thing.

It really did not take that much paper to do these and they go together pretty quickly doing them back to back like this. I packaged them with 4 1/2" envelopes.
just like this, no sentiments, no extra decorations.

11.01.2017

WOYWW # 439 {Falliday's Wrap up }

 Happy Desk Peeking Day, if you'd like to see more and or play along
 you can do so here at our Hostess Miss Julia's blog.

 in the center you can tell I had just finished the last thing I uploaded to the fallidays gallery last night which is the snowglobe card below. There are also little piles of extra things that were cut along the way and a combination of Zig markers I found that I liked as a base on Penny Black Hedgehogs ( that I do the shading over the top with pencils) but, having the first layer of color go down with pens really speeds the coloring time up. (when you are trying to make more in less time)

 Off to the far right is the pile of unfinished tutorials I printed ( a shaving cream background with a twist and a turkey that stands upright (not a card)
and the of course required ( by my brain ) spread sheet on paper so I can doodle on it list of all the challenges.

 This card uses up one of the Dendritic Backgrounds  
That was made for Shannons challenge that I did on some white mullberry paper and I thought it looked like branches. in the beginning I had thought to raise up the whole diecut panel so the light would flow through it better so you got that cool effect but, really wanted to keep the card on the flat side and ended up choosing a cream card base so you can still see the paint patterns on the paper. 
 
what my coffee table upstairs looked like hmmm maybe Saturday? Maybe Sunday? ( I forgot) but, I did finish all 30 challenges and maybe 9 or 10 of the daily challenges in last week and 8 of the tutorials. so, I am pretty pleased with that. It was a lot of fun.

10.30.2017

More Fallidays & Daily Challenges

 
 So, continuing with the daily challenges the Thursday challenge was to "cut it out" have something you had cut with scissors on the project so, I finished off those tags that have been under construction for that one. the List and the packages and the love santa words are all from the Hero Arts cut and stamp Christmas list set and some of the other words are from the Unity Stamps naughty or nice set. 


 On Wednesday the challenge was a sketch one that looked like this
So, the hedgehog is an older one from Penny Black called Daisy swing it was colored with zig clean brush markers with some prisma & polychromos pencils over the top.
The lace is vintage and that whole wood grain panel is up on pop dots over the base.

 On Friday Dina had a mixed media challenge that was to be inspired by this photo below, I mainly worked off the colors and continued with that use some stamps that have not seen ink project I have been twisting the challenges to work with for me these last few weeks. the Gorjuss girl is colored with copic markers, polychromos pencils, some white gel pen. ( technically for SCS that makes her mixed media) the panel under her was done with Alcohol inks on Yupo.


 The saturday challenge is an Inspiration one and this week Steph chose a store filled with the sweetest stuffed animals type gifts in it and I chose this baby Giraffe from the Jellycat store.


The top sentiment comes with those Giraffing me crazy giraffes from My Favorite things and the sentiment below that is from the Lots of Hugs set also from them.

 On Friday Jeanne had a challenge for the free for all to use fiber... any kind you wanted.
and what I need more of is Christmas cards. so, This was done as a simple one where I poked a hole through the Yupo (heavy weight) alcohol ink background with a paper piercer and ran the cord through the hole and up the back side of the panel to tie the bows at the top.

 It's very glimmery in real life the white is a glitter cardstock and the navy is a shimmery one from Stardream and there are clear rhinestones on the die cut panel. I used that Birch Press Bailey trio ornaments die on that.

 Now, this is for the tutorial # 8 which is a Mason Jar topper (you can find the instructions here)
I think this is hands down one of my favorite gift ideas from this month, the gist of it is to cover duck canvas with two coats of Gesso and then stamp on that (heat set it) color it, and die cut it to be glued to the seals inside rings for canning jars. ( there is cheap white foam under the canvas on mine below but, from the angle I shot them at to show off the stamping that probably does not show up very well.

 I geared mine to work around things we have canned for real, the heart shaped chili peppers wreath is an old one from PSX thinking jars of Salsa here, the strawberries are from an old sketch book type set from SU that had some script off to the left that I had masked off and the bottom one is some unmarked Tomatoes stamp. They were all colored with derwent watercolor pencils. ( very easy )

 On Sunday the Featured Stamper Challenge headed to Jennie's gallery and I stopped in my tracks at this one because, I thought it was such an awesome design ( and not anything like what I would normally make if left to my own devices..) so, changes were to switch the washi tape strips to diecut scrap printed papers, I switched out the circle framing for a wreath that I made into a frame by cutting out inside and out loosely ( to keep the berries) with scissors. That noel is a Echo Park die, its cut twice the top layer is gold mirror and the bottom one is just smooth white neenah. that is up on foam pop dots over the background. (the colored background is one of the Yupo (ranger) alcohol ink ones from the rainbow on the table.


Which brings me to Monday and the first of two the second I will do after work because, it also looks like a very fun thing to play with. but, this one was done for Kia's clean and simple inspiration photos of unusual for you to make Christmas trees and I chose photo #3

We had gone out to dinner last night and when we came home the Monday challenges were up, so my card was shot in the deep dark under the artificial lights and it is really not that halloween-ish colored in real life. The frame is up on black foam pop dot tape and the fibers were pierced through the Judith tree. and then I noticed the star at the top and decided that, if I tried to heat emboss a star up there I'd probably catch the fibers on fire. so, decided to be cautious I looked for a white star button, did not find one and finally decided on this flower because, the shape. so, technically I have done all 30 challenges 8 of the last 7 days of daily challenges, and 8 of the 10 tutorials. I still have not made a decision on the foal point for this shaving cream sparkle tutorial ( #9) and I want to give the try a new technique from today a go also.

So, that is about it for the moment. Thanks for stopping by.