9.27.2022

Watercoloring Wreaths

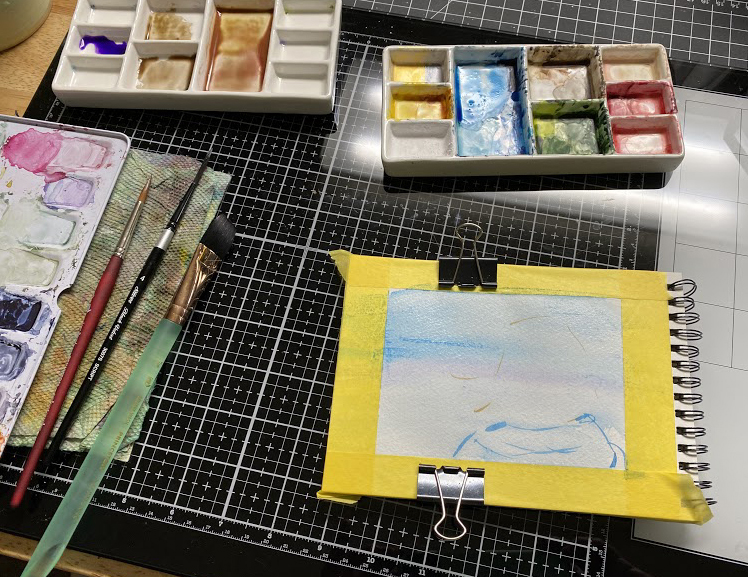
 This week Angie has chosen this wreath tutorial on YouTube from Lisa Hetrick for the water coloring challenge. So, I watched it about a week before I was going to paint one, and I started out with this one doing this from memory. 


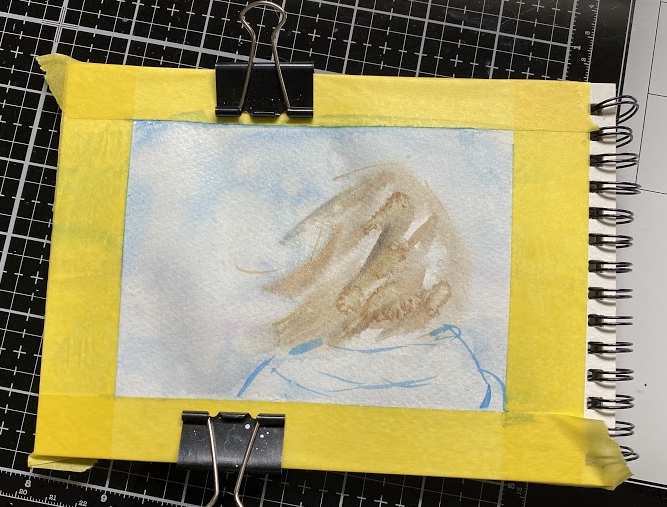
I had remembered it as using progressively larger round brushes so, this was the smallest brush and first round of leaves.

and in my mind the leaves got larger as the brushes did. 

and the wreath it self had a grapevine type wood look to it. 

So I continued to add more leaves and stems


And splatters and then, I had the bright idea to look at the video again sooo, out came another piece of cold press watercolor paper. (because, the wreath looks pretty thick and the colors seem to have a lot of orange and browns) 

and even though her tutorial for leaves shows them as skinny leaves the ones on that wreath were much rounder looking to me than mine were on the first one I did. So, I did try to make this paint have more water and be a little juicier as I did this second one.


the top one here is the first try and the bottom is the second one, and I thought about stopping here but, did end up cutting some Bazzill to turn these into simple flat cards. 


the one on the left is A6 in real life, and the one on the right is 6" square. I am not sure if I want to add sentiments to these on the fronts yet. So, I left that blank and just may do something on the insides before I send them out. That's about it from me, I hope you are doing well. If you'd like to play along with us for this challenge you can find the details here on Splitcoaststampers. Thanks for stopping by.


9.20.2022

Watercoloring Hair

 Hi, It's my turn to pick a tutorial for all of us teaching ourselves how to watercolor inside Splitcoaststampers and I have chosen this one on doing Hair blowing in the breeze from Yong Chen.

I really think that painting people could be the scariest thing because, in your mind you build it up that you want to get it right. know what I mean? so, I also think the tips shared in this video will help with adding shadows and highlights to furry critter scenes also. 

I still have pages left in this sketchbook so, this is what I was working on. 


First layer of paint, I did tape this down for a frame and used binder clips on the sides. 


a glance at the second layer of paints from the top view.


There was quite a bit of water on this book while this was going on and the binder clips did help. 


The brushes I used. I thought that round was a little more pointed at the end of the bristles than the rounds I normally use and this was a flat brush I had. I did see he used Calligraphy brushes but, I do not have any of those. 

I did end up adding just a bit more paint to this before the tape came off and funny true story, I left the tape on this until Tuesday evening. ( this was painted last Saturday) so, having those extra 2 1/2 days to dry taped down kept it pretty flat. that is a cool thing to find out. perhaps I will start leaving my paintings on the boards for a while before I try to make them into something. I hope you all are doing well. If you'd like to play along with us, you can find this challenge here at SplitcoastStampers. Thanks for stopping by.


9.13.2022

Watercoloring a field of Pumpkins

 This week Linda has chosen this video from Renata at MarenaART on YouTube. I did see that she has a print availible of the field she paints in the video but, I really do not have much luck with printing things from people like this. And on the other hand my stamp collection numbers in the thousands so, it seems more efficient to me when its not a remake the wheel to just use a stamp big enough to try the what they are teaching part of the video. ( KWIM?) 

So I picked up this Penny Black Pumpkins Stamp and used some Fade Out ink for it on Arches Hot press watercolor paper.


I did still try to add the background row of pumpkins and foggy bare tree forest but, at this point I ended up doing more and more layers of paint to this, I did use the binder clips on the short sides to help with the warping. 


After the masking tape came off I decided I really liked the white space around where it had been taped off and I wanted to keep that clean, and I also decided to forego the white marker highlights. 


I took a piece of soft suede and cut a rectangle out of the center of one say maybe an 1/16 to 1/8 inch smaller than A7 and used it as a frame to countersink the painted panel behind and then created the card from same shade of brown cardstock. So, it kept if very "clean and arty" feeling to me. I hope you all are doing well, if you'd like to play along with us you can find this challenge here at Splitcoaststampers to play along with us.

9.11.2022

Inspired by {ThisisJ}

 This week Kia has chosen the This is J site and pinterest boards for the Inspiration Destination. Where I found this little vignette of "Baby its cold outside" Pin that I just love the colors of. 

And funnily enough "Winter Wilma" an older retired set from Stampin' Up! had just landed in my mailbox. So, I inked her up with some Versafine Clair morning mist grey ink on some Arches 100% cotton hot press watercolor paper.

And proceeded to color her and the pup and kitty in those colors from the pin. After I was digging through my printed papers looking for something with similar colors found the pack from the Paper Rose winter wood pack close to the top and smiled. So, these are double sided papers and I wanted to bring in something warm texture wise like the knitted sweater and found this trim that is kinda chunky and fits color wise. The sentiment here is from the Simon Says Stamp tiny words Christmas set stamped with some Twillight versafine and cut out with a Nellie Snellen tags 3 die. this is tied on with some natural hemp string and the watercolor panel I decided to just distress the edges and put it up on some foam tape, keeping it simple and rustic. This one finished out at 6" square in real life. I hope you all are doing well, Thanks for stopping by. If you'd like to play along with this challenge you can find it here at Splitcoaststampers.


9.06.2022

Simple Watercoloring

 This week the Water coloring team is taking a look at this video that Lydia made about watercoloring a stamped image. 

So in a similar type of thing I decided to stamp off some stamps on my desk that had come in the mail recently on scraps of watercolor paper. 


This is Breezy Pine from Stampendous's House Mouse line. I stamped it with morning mist versafine on some Arches Hot Press watercolor paper and proceeded to put on a layer of Daniel Smith watercolors. 

Second layer of paints. a few shadows. I think I added more paint to the pine branch and crevices than the mouse actually.


I wanted to keep this simple so I tied on some sheer green ribbon and used some textured grey Bazzill for the base. This one finished out at A6 in real life and I really had fun doing this and some extra free time so, I stamped off these (below) on scraps. 

and did pretty much the same thing, this is first layers of paint. the thing with switching back and forth between things you are painting on, it allows the first one to dry so, if patience is not your thing and you have a chunk of time you can get a few going. I did not tape down any of these and just shuffled them out of the way as I added more paint to them. 


this is either second or third layers of paints for these and somewhere between then I die cut them all with stitched dies. and this is what my desk looks like after work today. I hope you all are doing well. If you'd like to play along with us you can find this challenge here at Splitcoaststampers. Thanks for stopping by.


9.02.2022

Inspired by {Holiday Barn}

 This week Julie has chosen The Holiday Barn as the inspiration destination and I came across this sweet reindeer figurine that make me think of this old Stampington & Co. Large reindeer doll. So, I stamped her with some Versafine Morning Mist ink on some Arches 100% cotton hot pressed watercolor paper.

And used Daniel Smith watercolors on her. That panel was cut with a Heffy Doodle whimsical Metric wonky rectangles die ( fits on A6 cards) and was layered to a piece of Printed graphic 45 paper that I cut with pinking shears to go along with the whole stitched theme. The Speckled tan printed paper is from Maja Designs and the base is 6" textured Bazzill. The sentiment here is from Penny Black and I cut that one out with a stitched Memory Box circle die. I have no clue where I got that stitch printed ribbon from, I am not normally a person that picks patterned ribbons but, the colors were pretty close to how her plaid dress turned out. That's about it from me, I hope you are enjoying the start to the long weekend. If you'd like to play along with us you can find this challenge here at Splitcoaststampers. Thanks for stopping by!