Showing posts with label Shabby Chic. Show all posts

8.12.2019

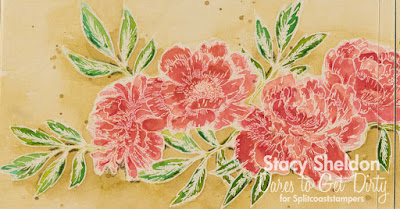
Dare to get Dirty 2019

Did you know that for the 15th anniversary of the Dirty Dozen the challenges are open to everyone who wants to play along not just fan club members? Of course most people enjoy their fan club memberships and the perks are well worth the fee. If you'd like to know more about joining the fan club you can find that info here.


 This was done for Lydia's first challenge seen here. 

 This was done for Lori's challenge seen here.

 This was done for Sandee's first challenge seen here.

 This was done for Angie's challenge found here.

 A closer look at the stickles on the butterflies wings.


This was done for my own challenge seen here.


A closer look at the coloring done with pencils.

 This was done for Ann's challenge seen here.

 A closer look.

This was done for Bev's challenge seen here.

 This was done for Joanne's challenge seen here.

 Done for Julie's challenge seen here

 A closer look at the coloring.

 This was done for Lee Ann's challenge seen here.

 This was done for Kia's second challenge seen here.


This was done for Mary's challenge seen here.


This was done for Polly's challenge seen here.

 This was done for Nancy's challenge seen here.

 A closer look at the center.


This was done for Sandee's second challenge seen here.
 
  A closer look at the center.

 These were done for Shannon's challenge seen here.

 This was done for Andrea's challenge seen here.

 A closer look
This was done for Kelli's second challenge which was to use something you made this week that did not make it onto a previous project, so that green background behind the reindeer is a scrap of the background from the card I made from Lee Ann's challenge. 

12.21.2018

Inspired by {the Lakeside Collection}

This week Brenda has sent us to the Lakeside collection for our Inspiration hunting. and I happened across this distressed butterfly on the white washed wood fence and loved the textures.

 This butterfly (Sizzix Tim Holtz layering butterfly) was diecut from some recycled cardboard from a delivery that I had used some acrylic paint on the ribs.
 ( there are 4 shades of greens with some white)
(this was shot with some of the bigger blobs still wet ha ha) the sentiment is from Penny Black and up on foam pop dots, the white fence print is a hobby lobby paper. the whitewashed cardstock base is from Coredinations and this one finished out at 6" square in real life. I just may add some wire antennas when the paint drys completely but, have not decided that one for sure or not yet.
I hope you all are ready for Christmas but, in case you are still working on those projects there are holiday things in that store also.

These outdoor decorations can be found here in their store. And you can find this challenge here to play along with us. Thanks for stopping by.

8.27.2018

A few Christmas challenge cards


This week's featured stamper is Mandy who has this fabulous shabby Christmas card seen here that I chose to case. I love that embossed sheet music peeking through the candles so much. so, I moved my embossed layer to be a mat under that solid gold glimmer paper ( which did not like being heat embossed with the UTTE. ( in real life that sheet looks shiny where it looks burnt in the photograph) The gold is from recollections and the shiny gold the candles were cut from is from Bazzill. the lace is vintage and the ribbon is unknown. that snowflake charm came from Stampin' Up! a few years aback and the sentiment is from the Tim Holtz great outdoors set. this one is A7 in real life.

 Now this, I had to have this die (Hero Arts deer & Ornament) , and it turned out to be a two piece looking one so, I cut it apart... and then I ended up using a large (small) circle die from spellbinders to sandwich it all back together haha. I did add the faces and texture with some pencils on the diecut scene part.


So, trying to decided what I like better this one I did as a Card for the Dirty Dozen August Christmas theme and left the scene as a silhouette. the background was cut from an alcohol inked piece of Yupo. the sentiment is from the Stampin Up set called and many more. this one is 4 1/2" square in real life.
I did haul both of these to work to get a second opinion and June was of the thought that this card needs the faces drawn on like the tag. So, I may or may not do that later. Thanks for stopping by.

4.10.2016

Some recent Challenge cards

 Last weekends Featured Stamper was Simone who posted this most awesome baby card I have seen in a while. ( I loved every detail so much I promptly looked at frantic stamper to see if they had one, and mine landed in my mailbox on Wednesday. ( so this was done very late) Changes were to add layers and such. the framed white layer is from the ODBD recent loot lavish layers die, the sentiment is from the Mama Elephant labeled messages set. the Memory Box Precious Mobile die was cut with both MM Silver Mirror Paper and some pink shimmer to do embedded dies on the hearts that cut as frames. these are all up on pop dots. that sheer ribbon is unknown and the print paper is from My Minds eye.


 Now this is inspired by a wedding cake seen on this blog here. That rose die cut is from Heidi Swapp. (it feels like very thin wood veneer in person but, its packaging says its paper) ( well paper is made from wood but, you know what I mean) Its one of those multi packs where there are 2 each of 4 different designs. ( I found it at Joanns a month or so ago when Hubs needed foam for his gun safe remodel) The base on this is Blush Blossom and its 5X7 in real life. the sentiment is from Savvy Stamps cut with a justrite Vintage sentiment tag die.

 A closer look the center, the prima and wild orchid crafts blooms are layered. the pearls are from Prima also.

 Isn't that just amazing, while I was looking at all the cakes my head said OH My Gosh can you imagine how much time that took and wanting to cry when it was cut into. ( but, then I always think that when I see amazing cakes) (and I did click through to see the stencil they used and was really glad I just buy stencils for paper crafting and not food after seeing the price tag (sticker shock)


 Now this was done inspired by Cheryl's gallery This is not based on any one thing but, I totally LOVED these tea cups. and here and here. ( I have not clue what die she used for these they look like tea cup shaped gift holders to me)
I also really loved all the shabby chic cards with this awesome stitching on the edges like this card here. So, my card is kinda a mix of all that inspiration. It's 6" square in real life, the sentiment is from the Two Paper Diva's banners 1 sentiment set and the Tea Cup is from the Sizzix Tim Holtz tea time die, the white frilly layer is from the Our Daily Bread Designs Filigree Frames die, the lace and ric rac is vintage. the blooms are from wild orchid crafts ( because, as much as I love lumpy flowers on things I really don't like to make them which is just something I learned a long the way after buying a few rolled roses dies)

The cup body is up on pop dots over the saucer. and there is one tucked under the edge of the banner die with the sentiment too. The textured purple paper is from a multi pack that came from big lots many years ago when they first opened a store in this town. The print below that is from Basic Grey. I did use some bitty staples to attach the lumpy thick ric rac to this. ( which I added in mostly to cover up the backing up and locking of the stitches on those corners of the prints that were sewn. for a first time trying this stitch setting it does not look too bad but, I think the tension was just too loose to get it the tight look that Cheryl's have on her cards.?? ( not really sure that is just a best guess)